You can find the Safari App Extension I describe in this blog post on the App Store — if you find this blog post valuable, please consider downloading a copy!
NOTE 11 Jan 2022: This post is out of date, as Apple has now brought back support for Safari Extensions that use similar syntax to extensions for Chrome and Firefox. You might still find this post informative, but I recommend having a look at this and this video from WWDC’21 where Apple developers explain how ‘Safari Web Extensions’ are now developed.
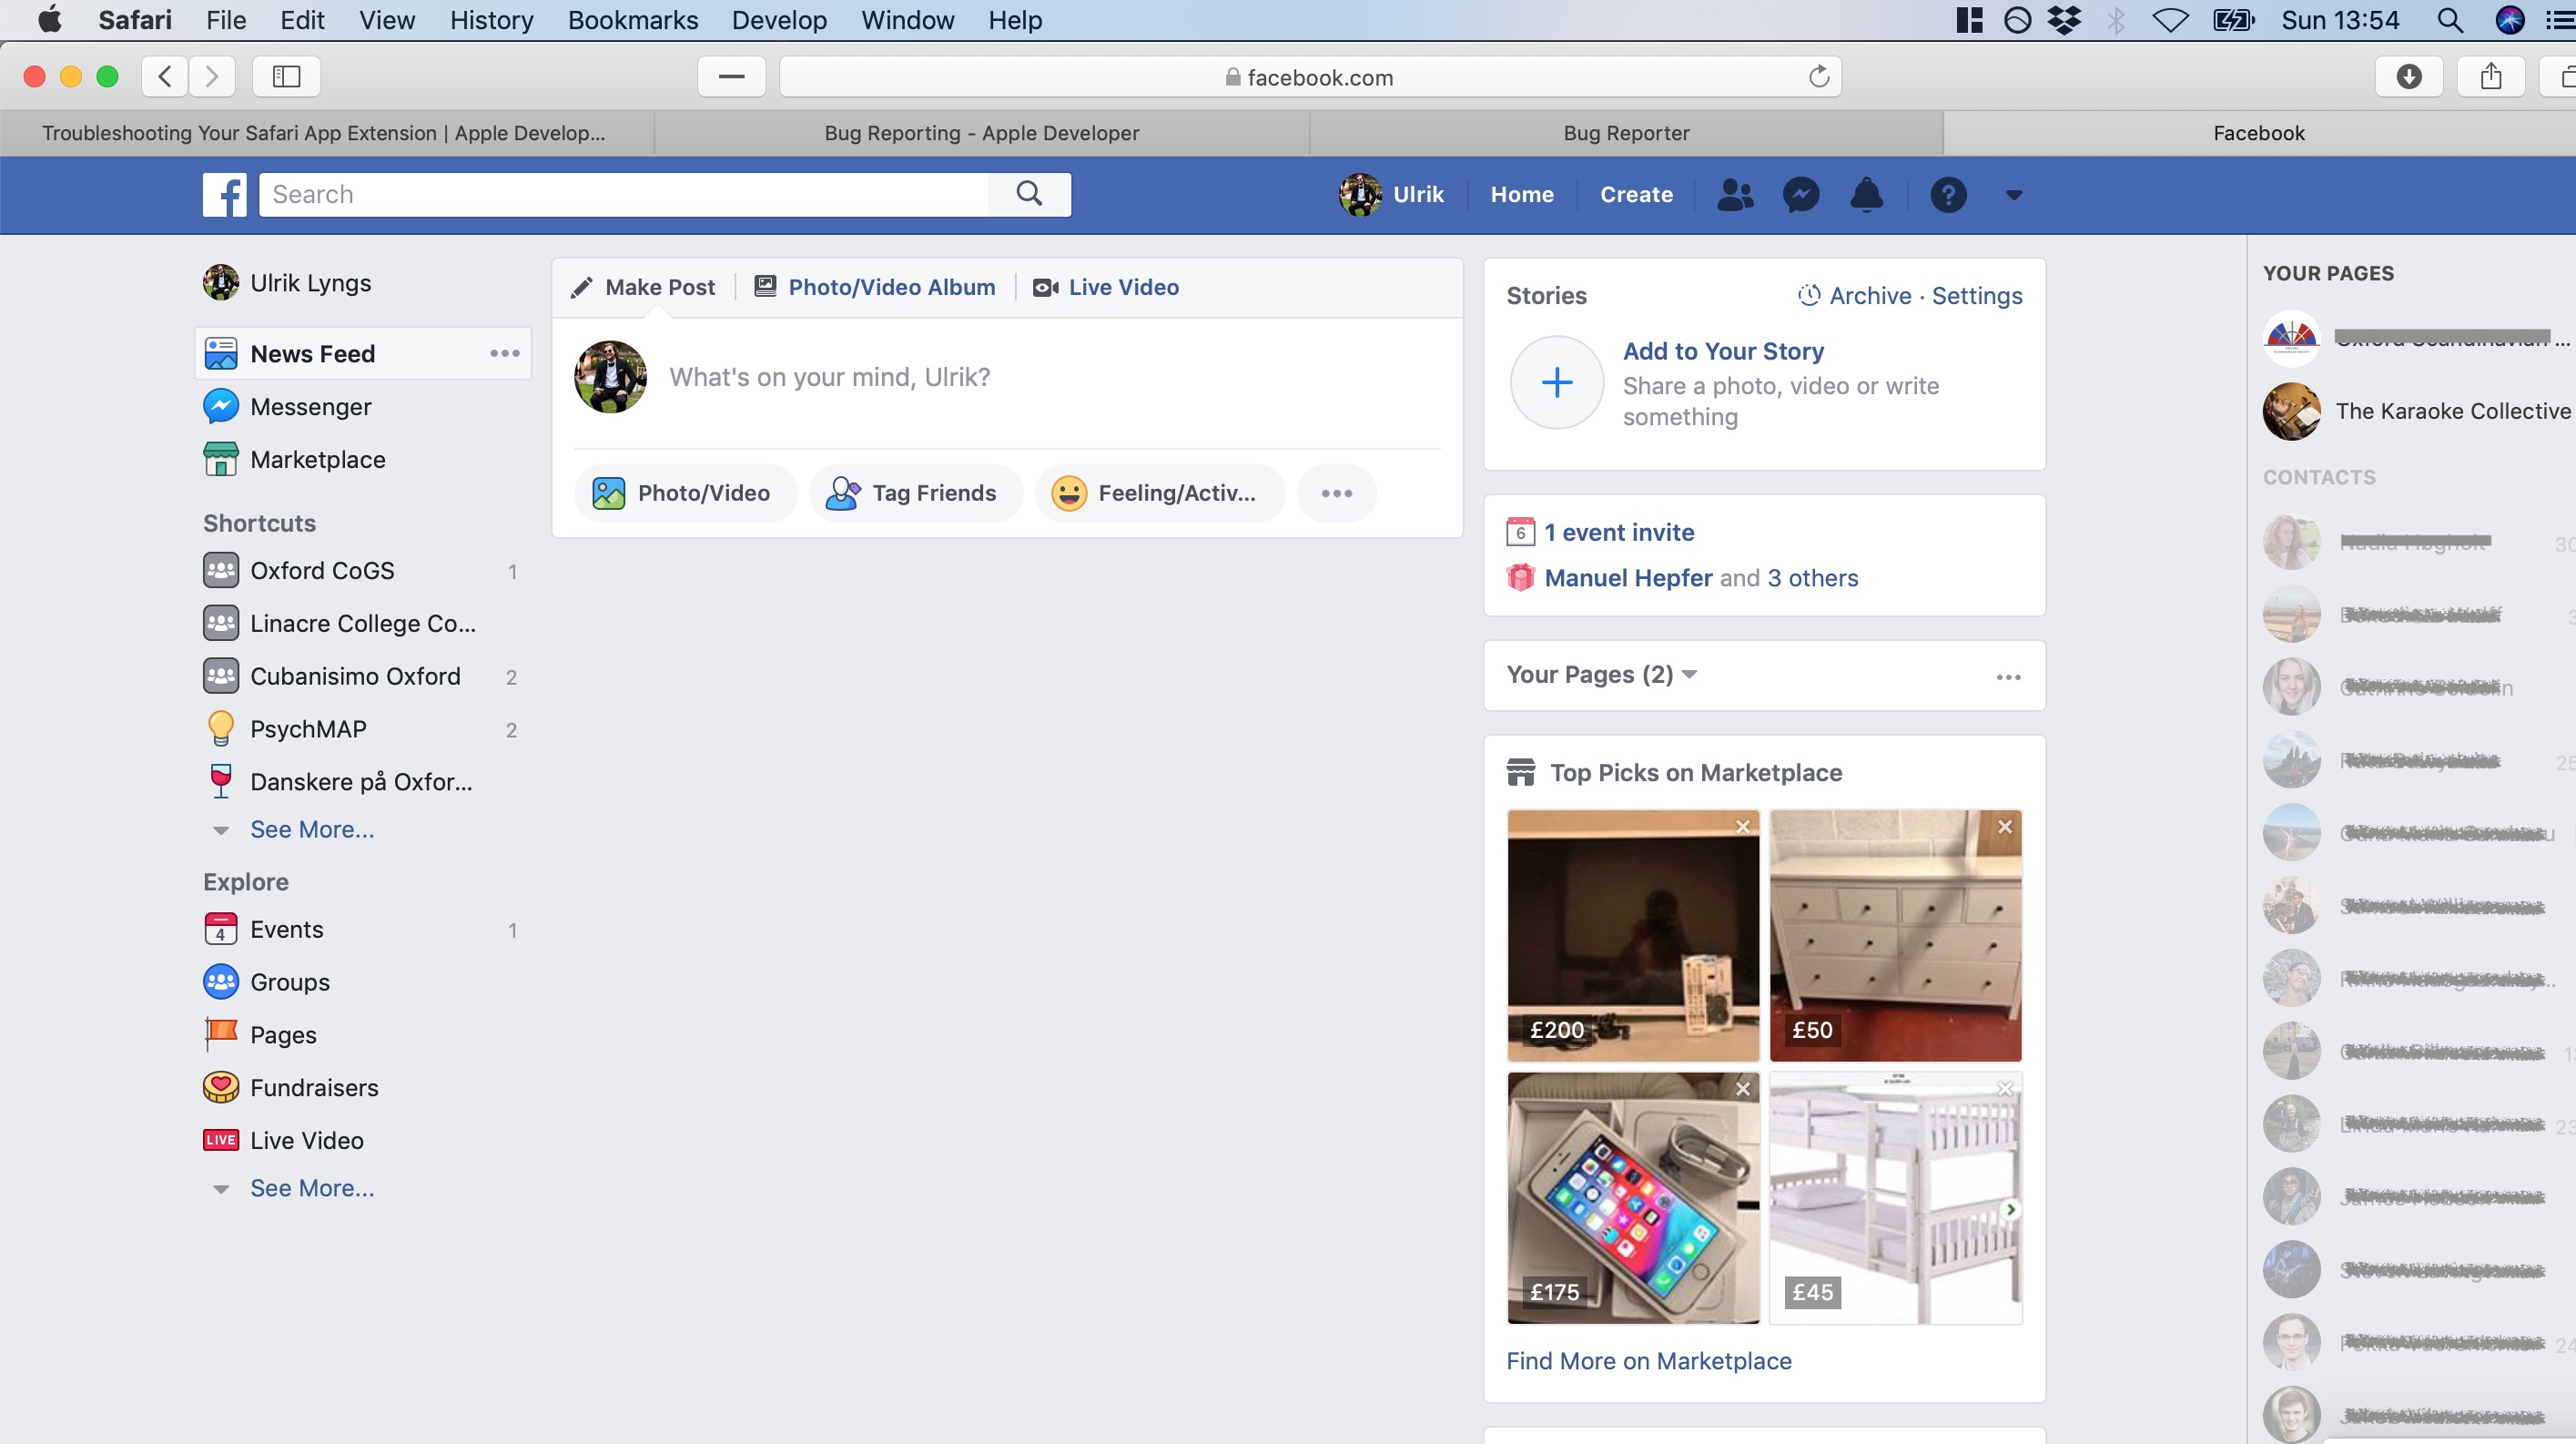
I previously wrote a little browser extension for Chrome and Safari that reduces Facebook to just the functionality I find useful, by removing the newsfeed and most other things that distract me on the front page.
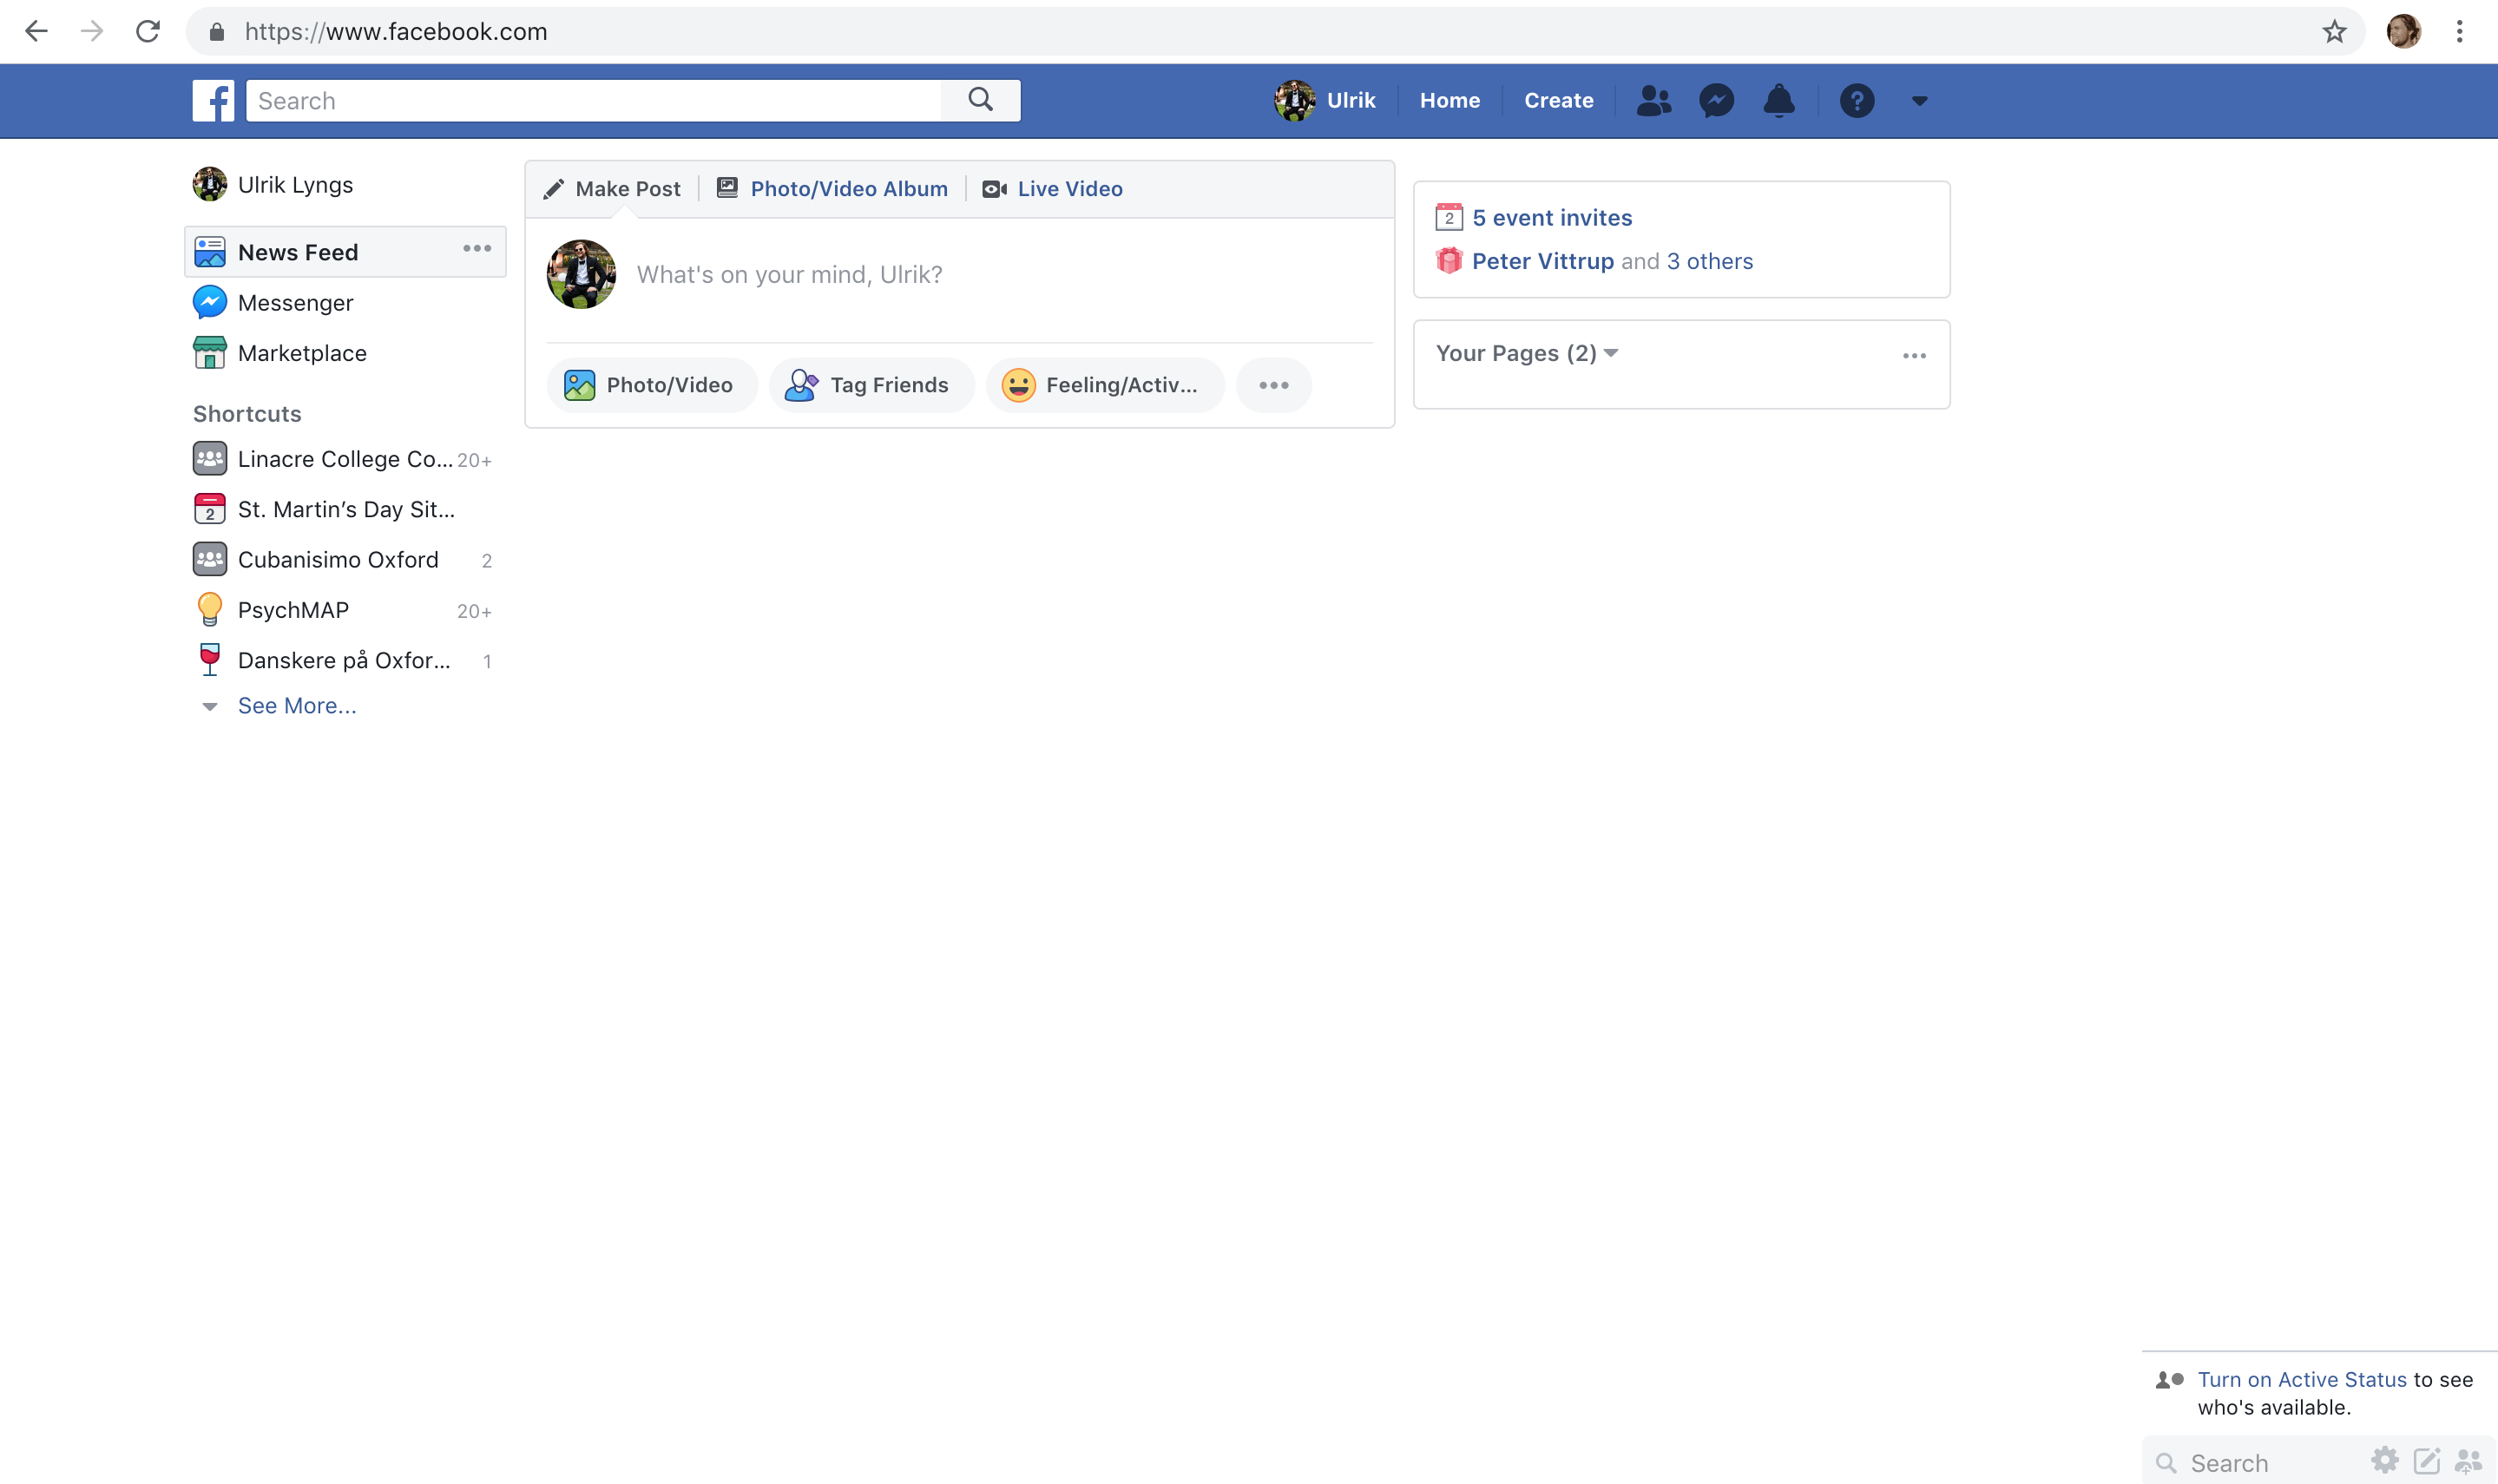
Facebook with no distractions
With the most recent update of Safari, however, my extension was automatically turned off everytime I closed the browser. And I discovered that Apple has an ongoing plan to integrate extensions to Safari with the usual development of Apple apps, instead of following the more interoperable approach to browser extensions taken by e.g. Chrome and Firefox. At some point in the not to distant future, the only way to get a Safari extension will be by downloading it as an extension attached to an app on the macOS App Store. [11. Oct. 2019 update: This has now happened as per Safari v13.0]
Sigh. I kinda like using Safari, mostly because Apple is putting more and more emphasis on protecting user privacy in times of ubiquitous tracking. Unfortunately, that means that any Safari extensions I’d like to build must be developed using Apple’s IDE Xcode.
I tried to do this but it was painful. Mostly because I couldn’t find a single tutorial online that just walked through a basic example. I did eventually figure things out using Apple’s documentation and talks from the Safari team at WWDC, but it was more way more frustrating and time consuming than necessary.
So, to make this learning quicker and easier for others, here’s a tutorial that walks through a simple example of how to build my "No Distractions" for Facebook as a Safari App Extension:
Step 1: Get Xcode
If you haven’t already, install Apple’s IDE Xcode.
Step 2: Create a project in Xcode
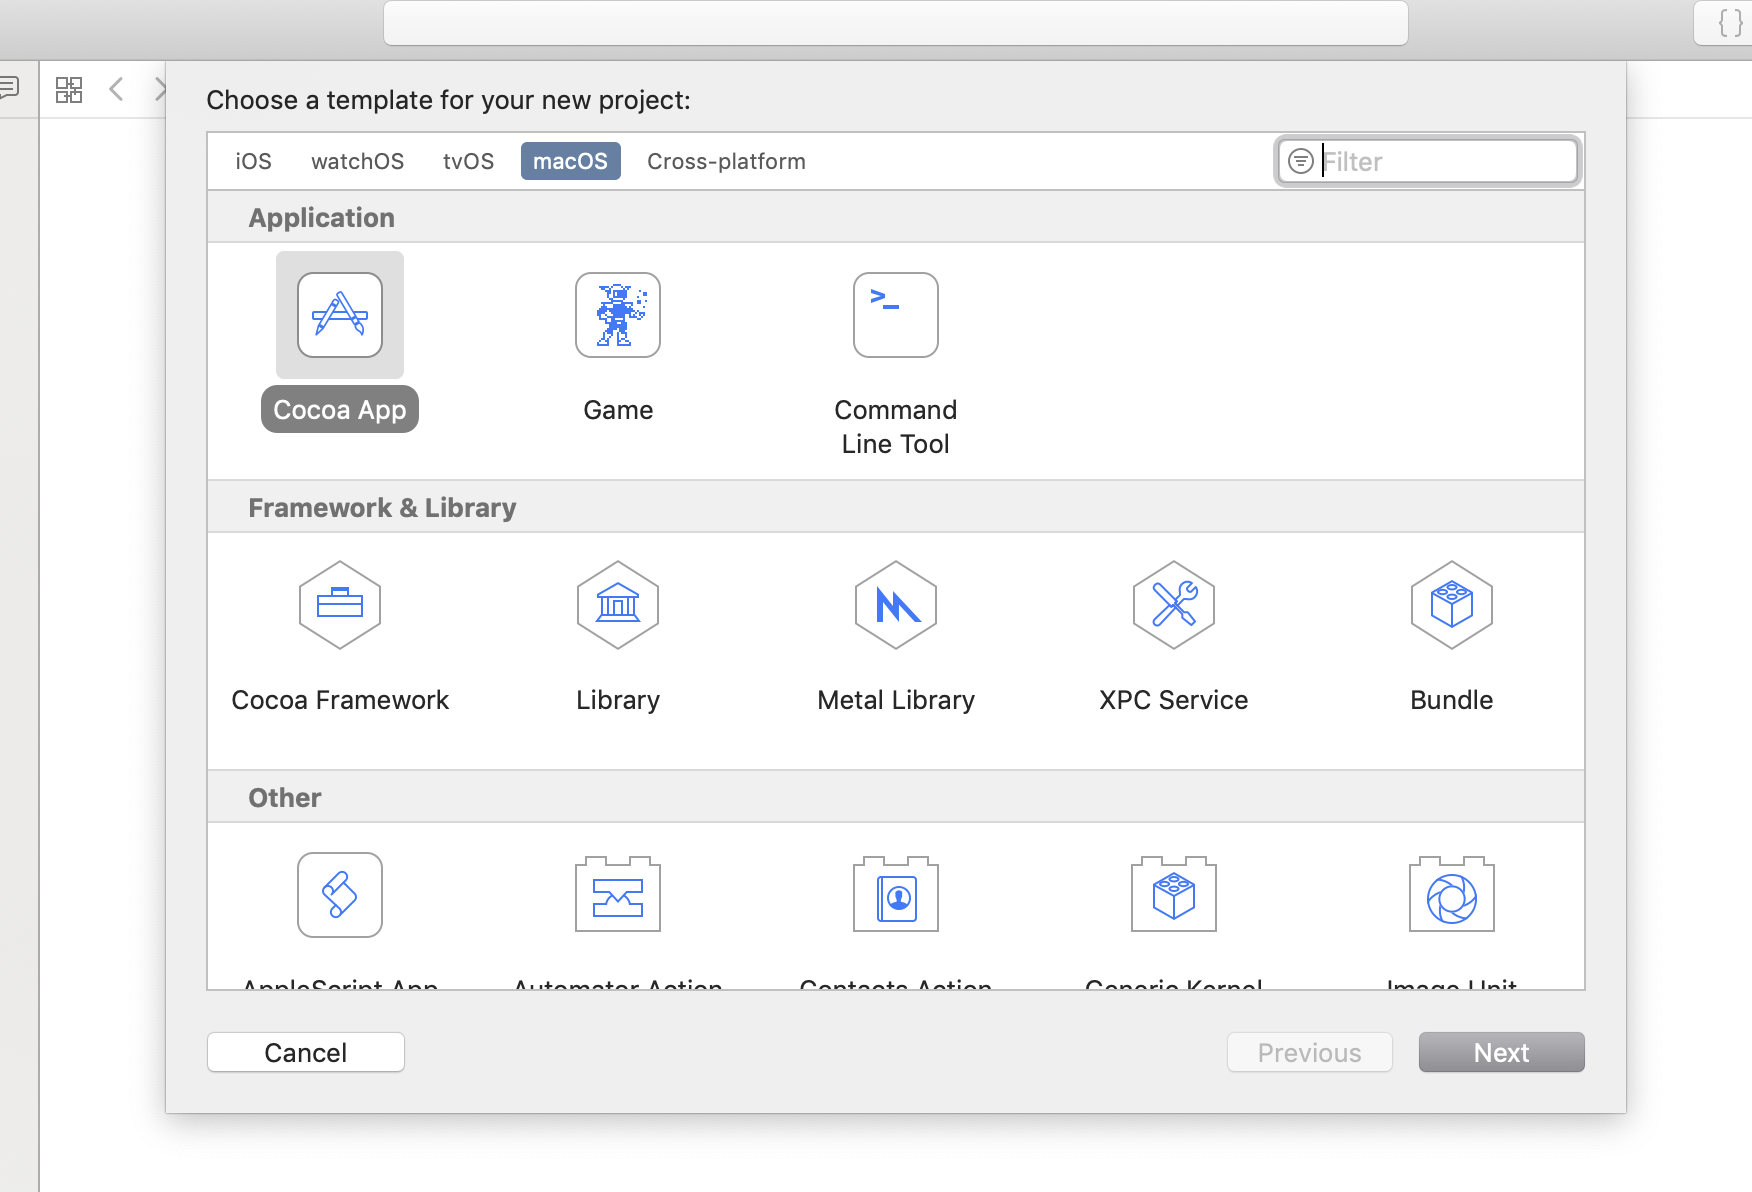
Open Xcode, create a new project, choose ‘Cocoa App’ under the macOS project templates, and click ‘next’.
Create cocoa app
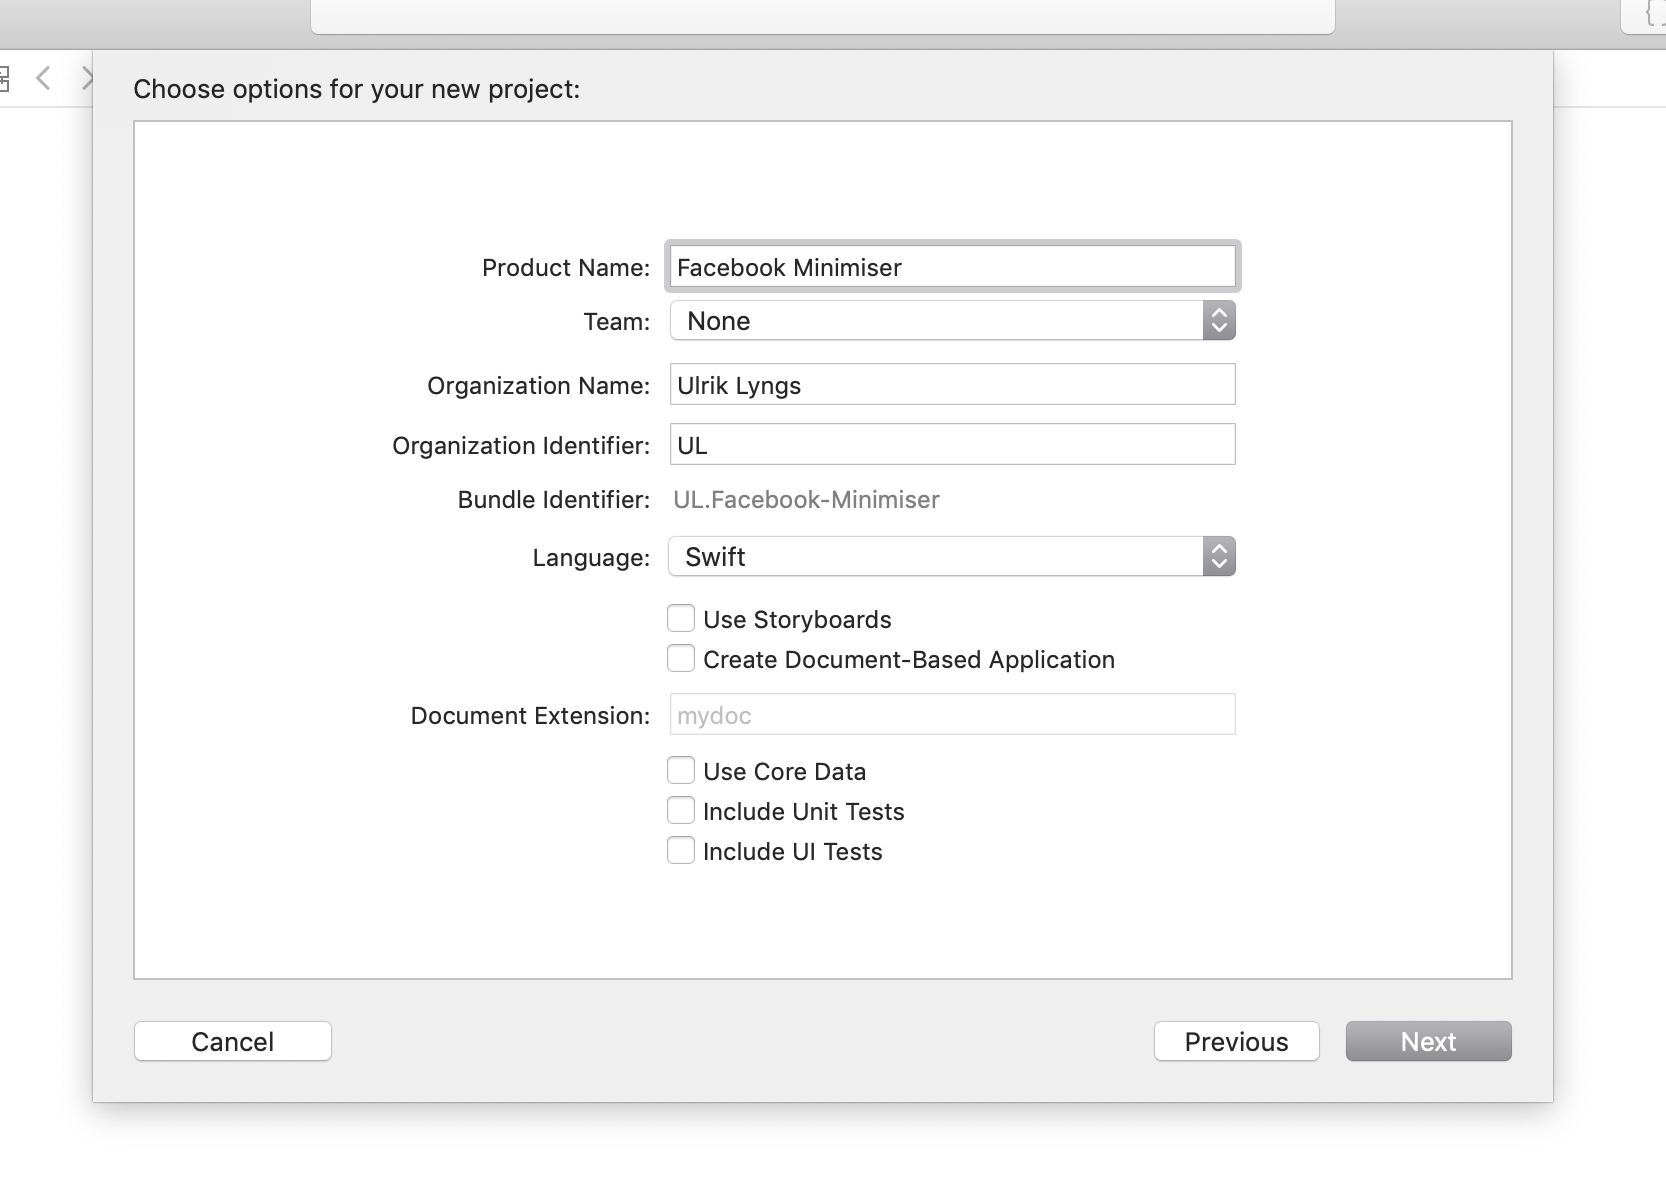
Give the project a name, e.g. ‘Facebook Minimiser’. Untick ‘Use Storyboards’, ‘Include Unit Tests’ and ‘Include UI Tests’, as we’ll just do a minimal example, then click ‘next’.
Name project
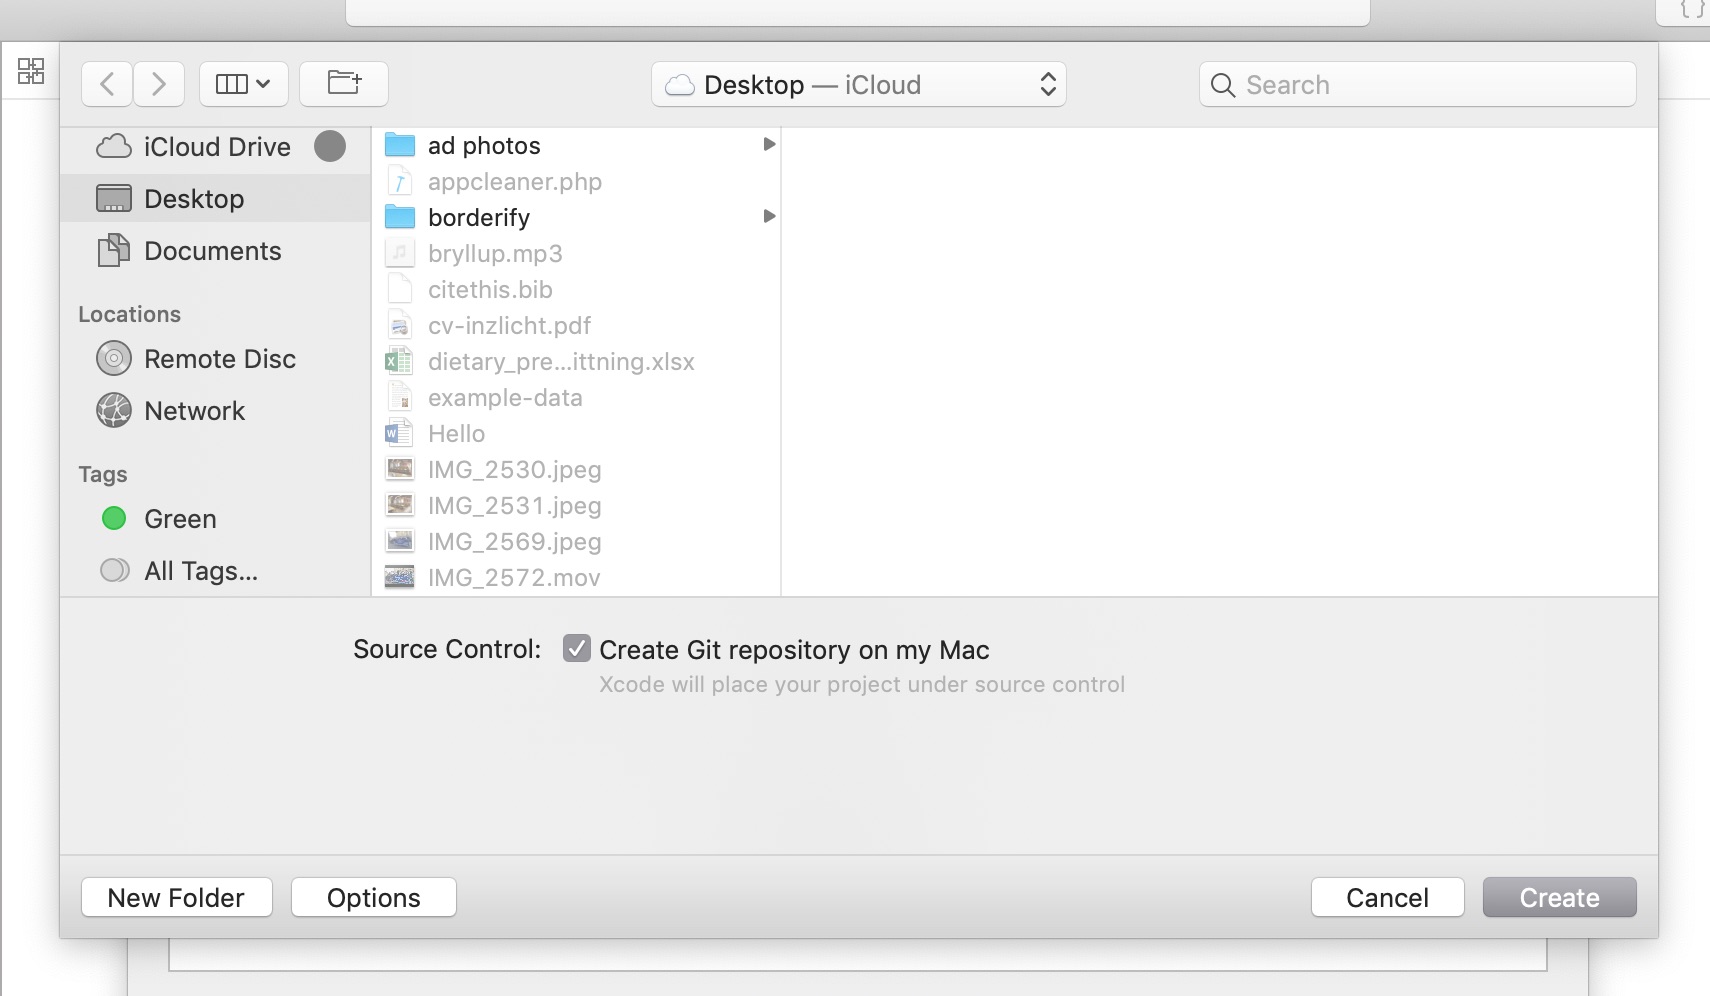
Choose where to save the project - let’s just save on the desktop for this tutorial. Click ‘create’.
Save project
Now we see the template app open in Xcode.
Template project open in Xcode
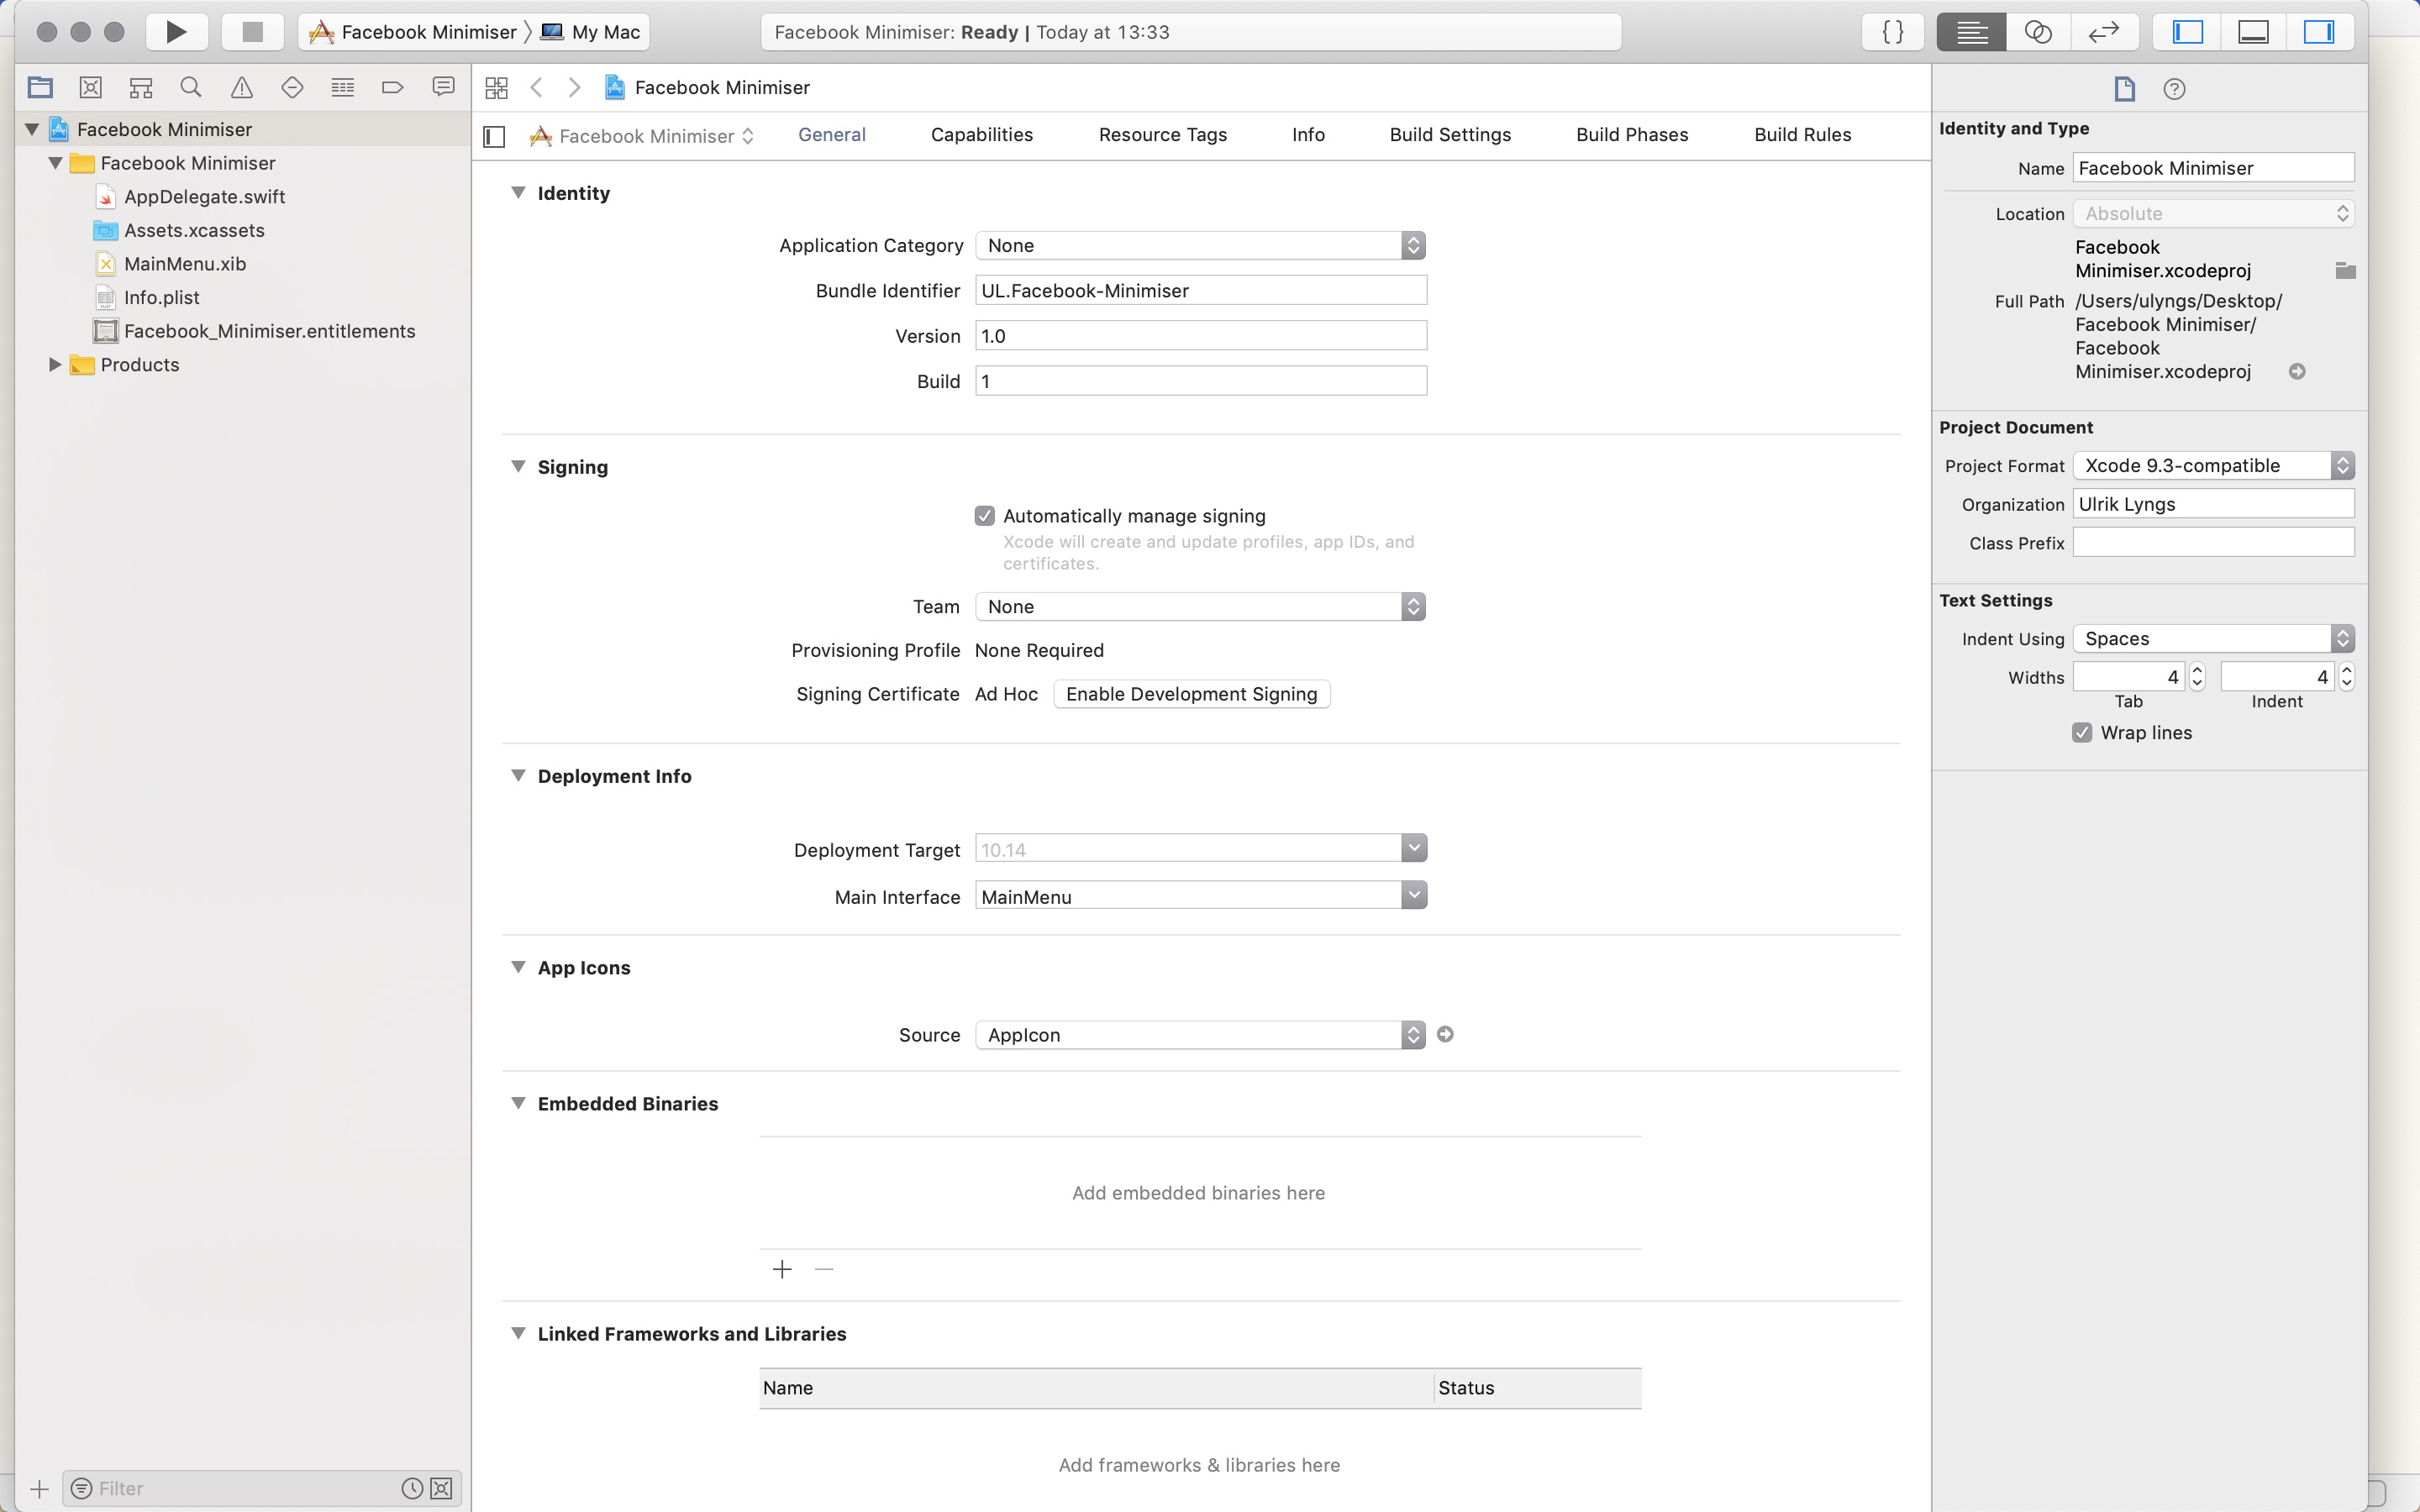
Step 3: Add a Safari Extension ‘target’ to the app
If you, like me, are new to Xcode, try running the current template app by clicking the ‘play’ triangle icon in the top left. This will build and run the app:
Build template app
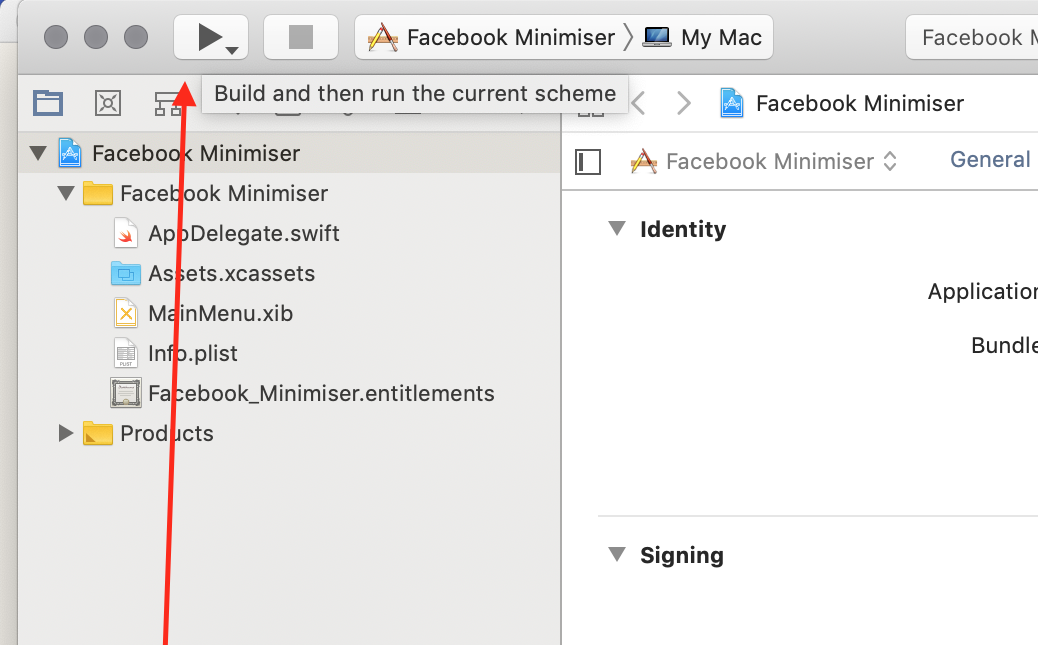
As we haven’t added any user interface to the app, the opened application window will just be blank:
Blank template app opened
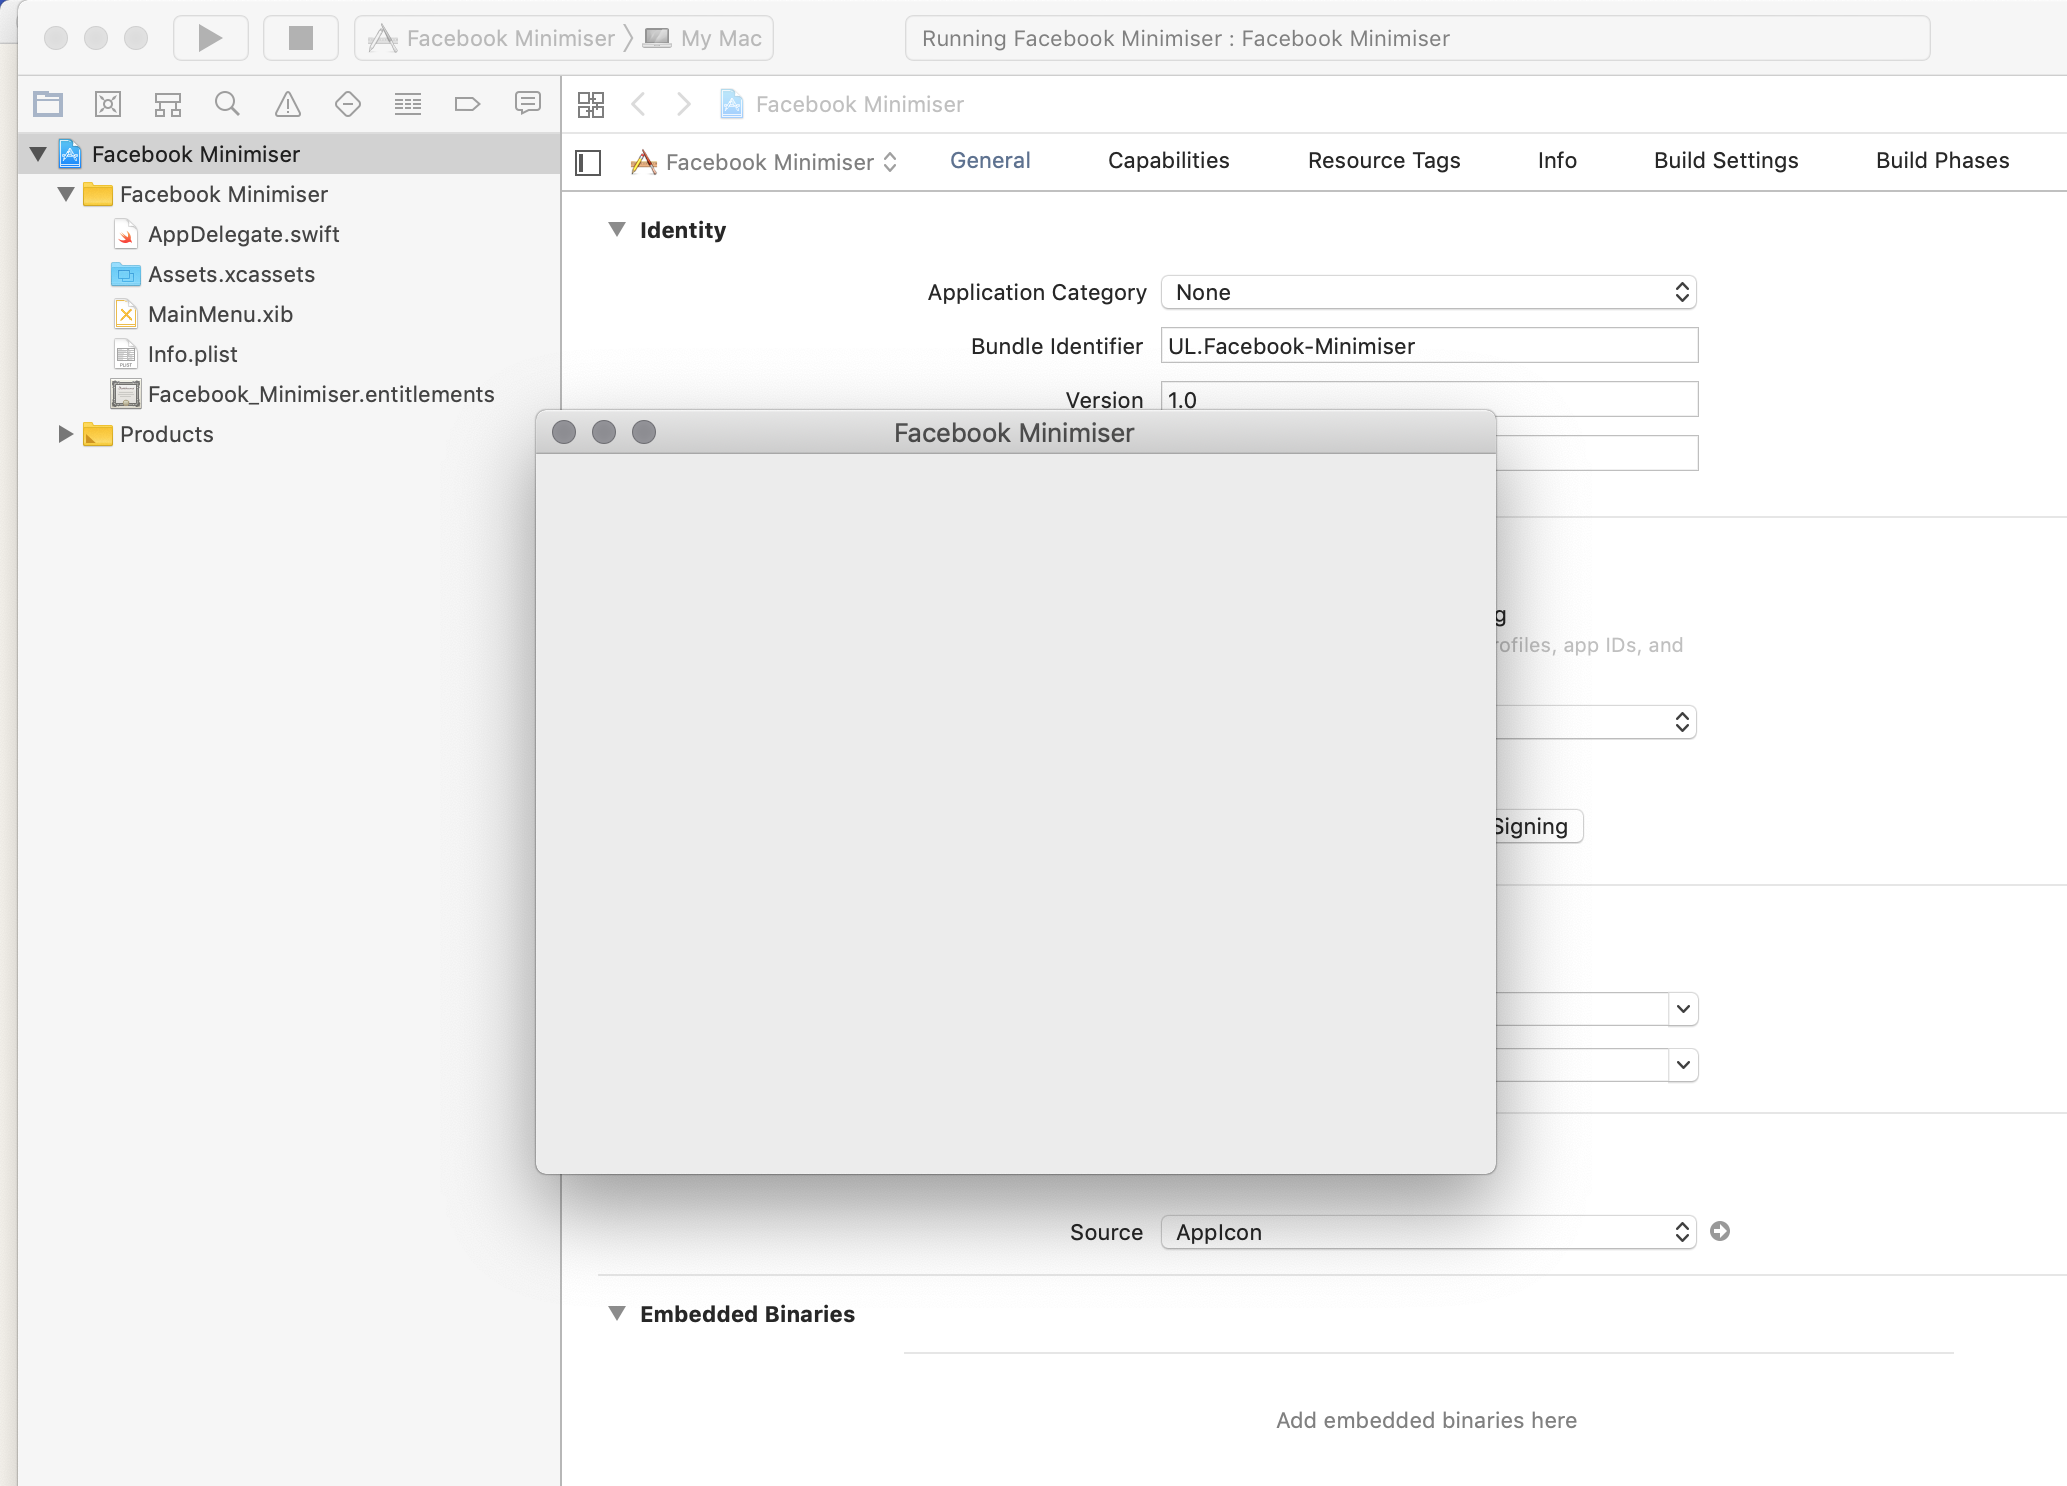
Close the application again:
Closing template app
Now we add a Safari Extension ‘target’ to our app. Click ‘File’ -> ‘New’ -> ‘Target…’:
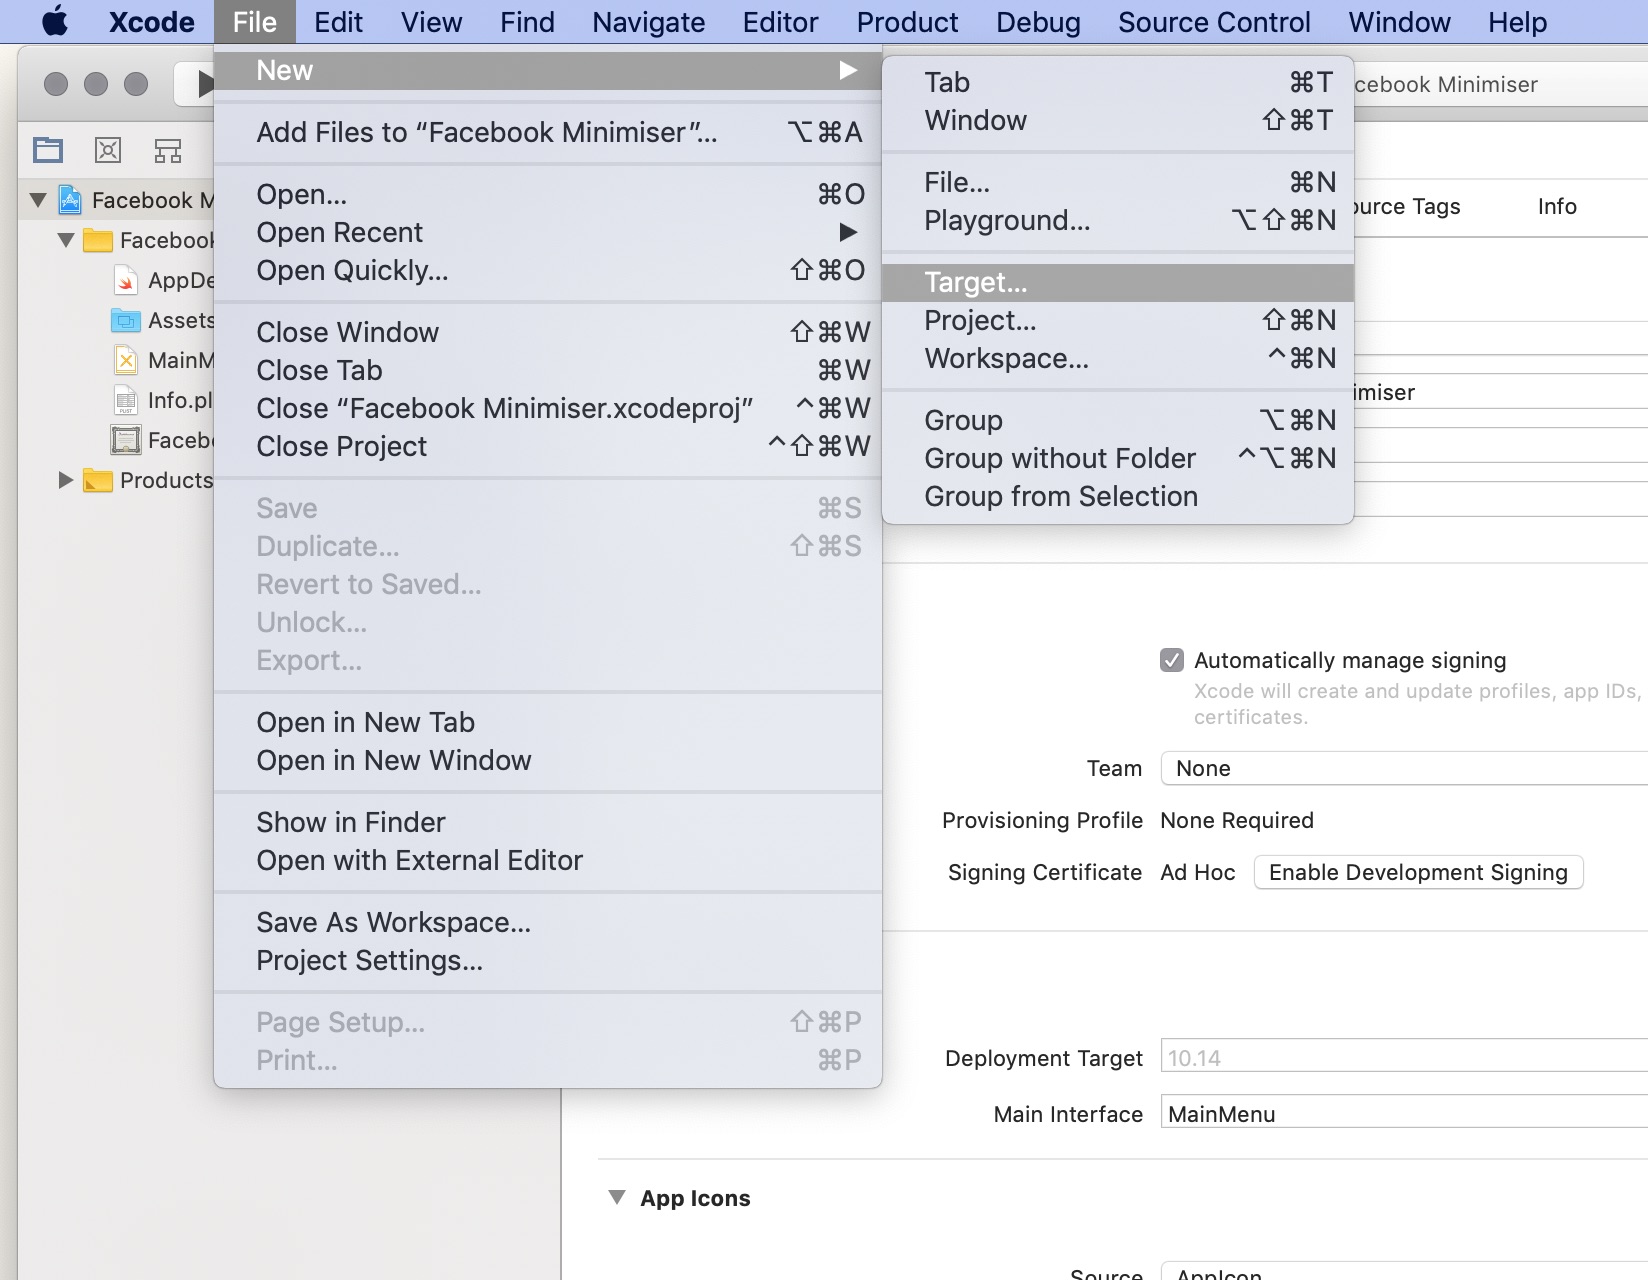
Adding extension target
Under ‘macOS’, choose ‘Safari Extension’ then click ‘next’.
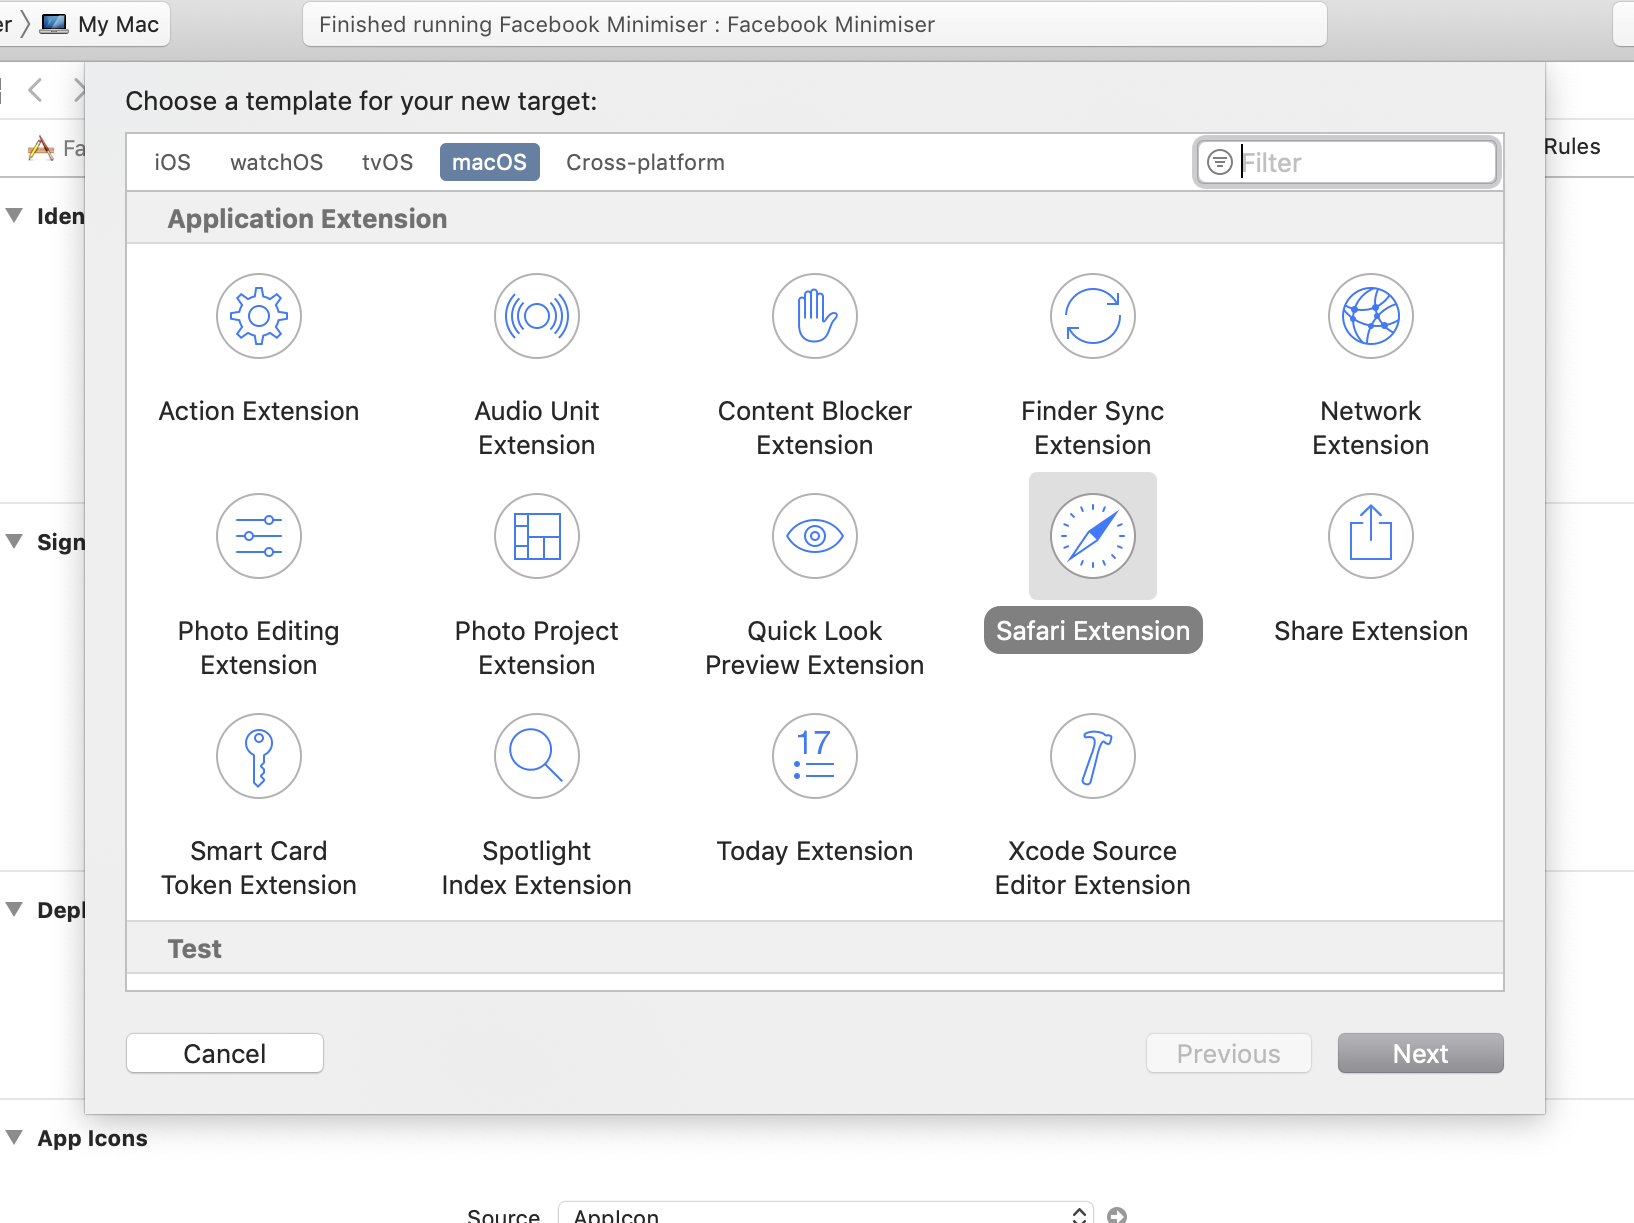
Choosing Safari Extension template
Give the extension a name, e.g. ‘Facebook Minimiser Extension’ and click ‘Finish’:
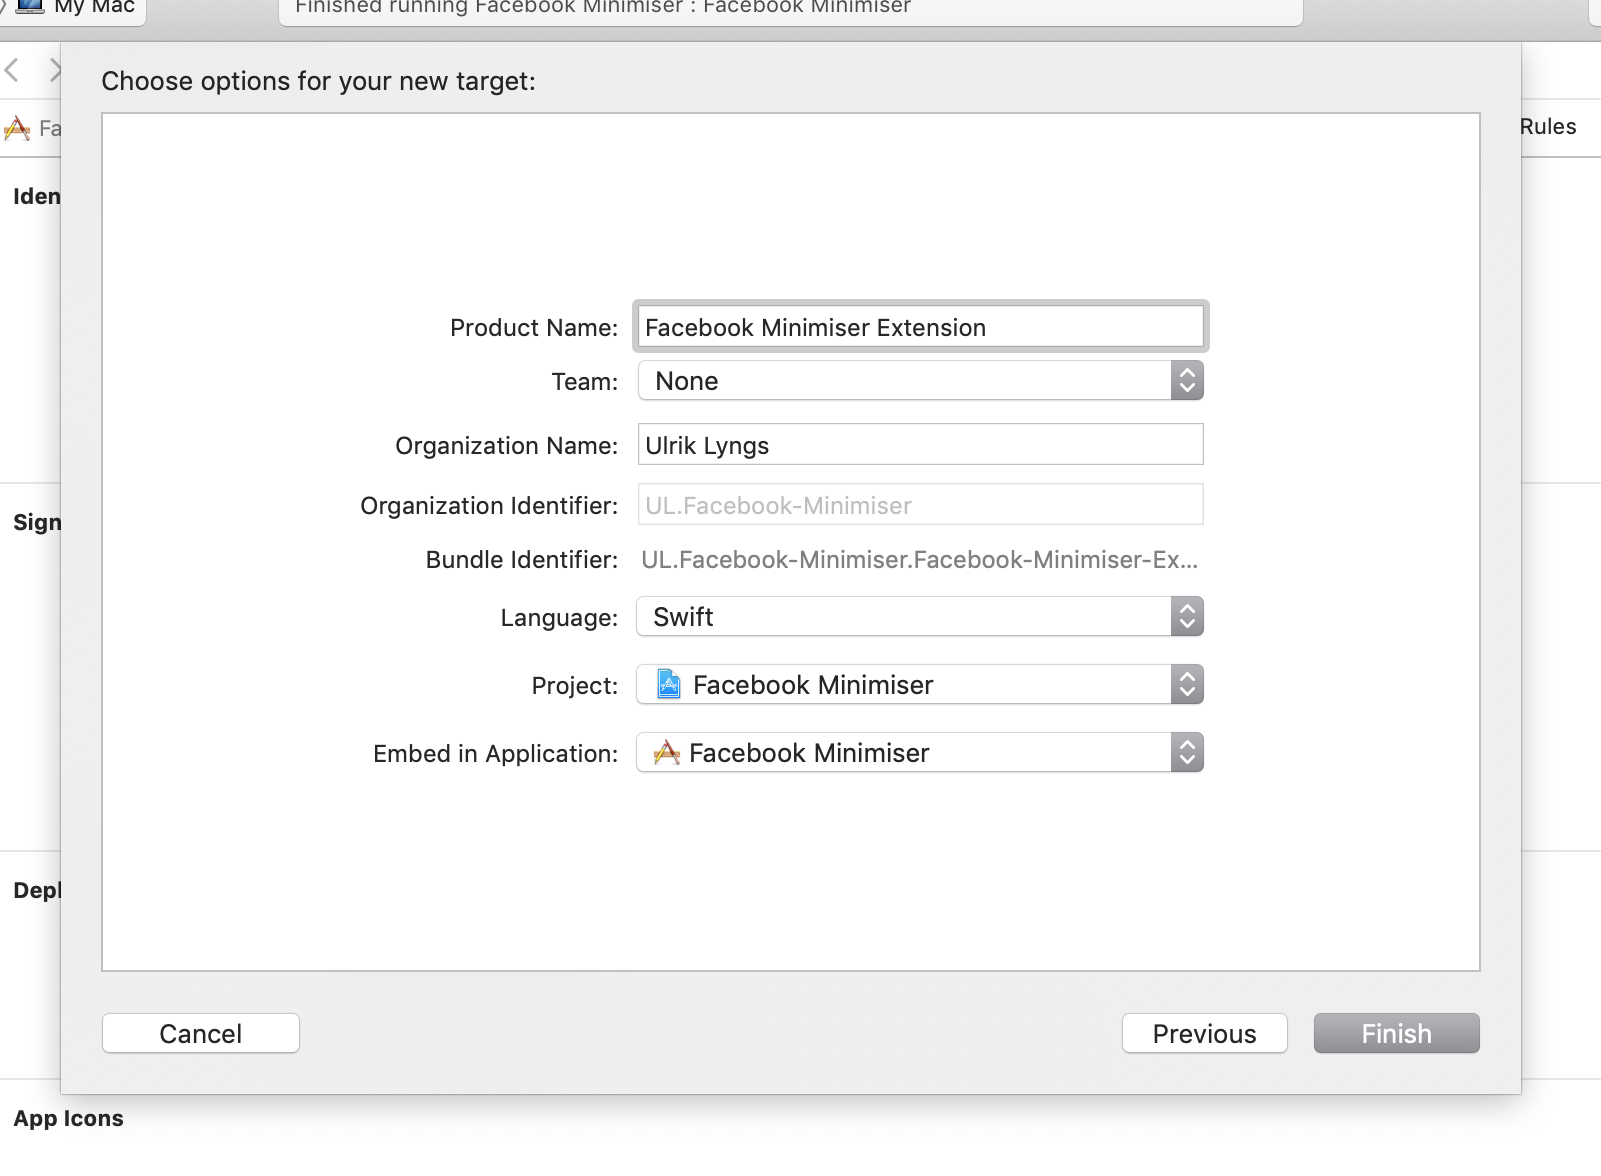
Name extension target
When Xcode asks whether it should ‘Activate “Facebook Minimiser Extension” scheme?’, click ‘cancel’.
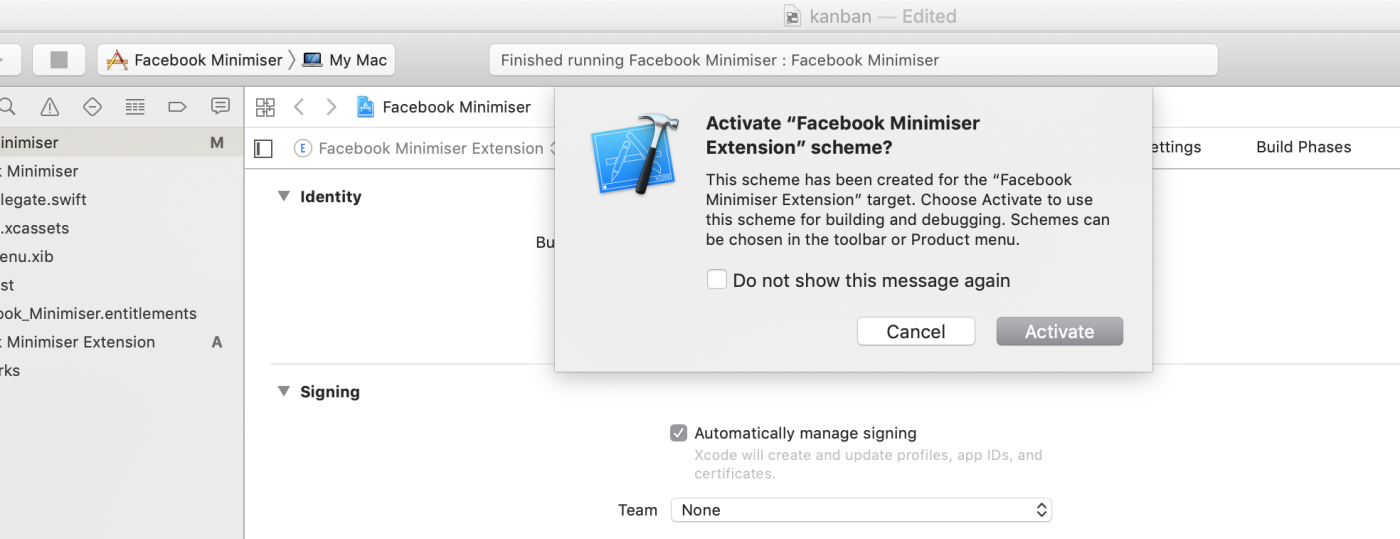
Name extension target
Now a folder called ‘Facebook Minimiser Extension’ has been added to the project:
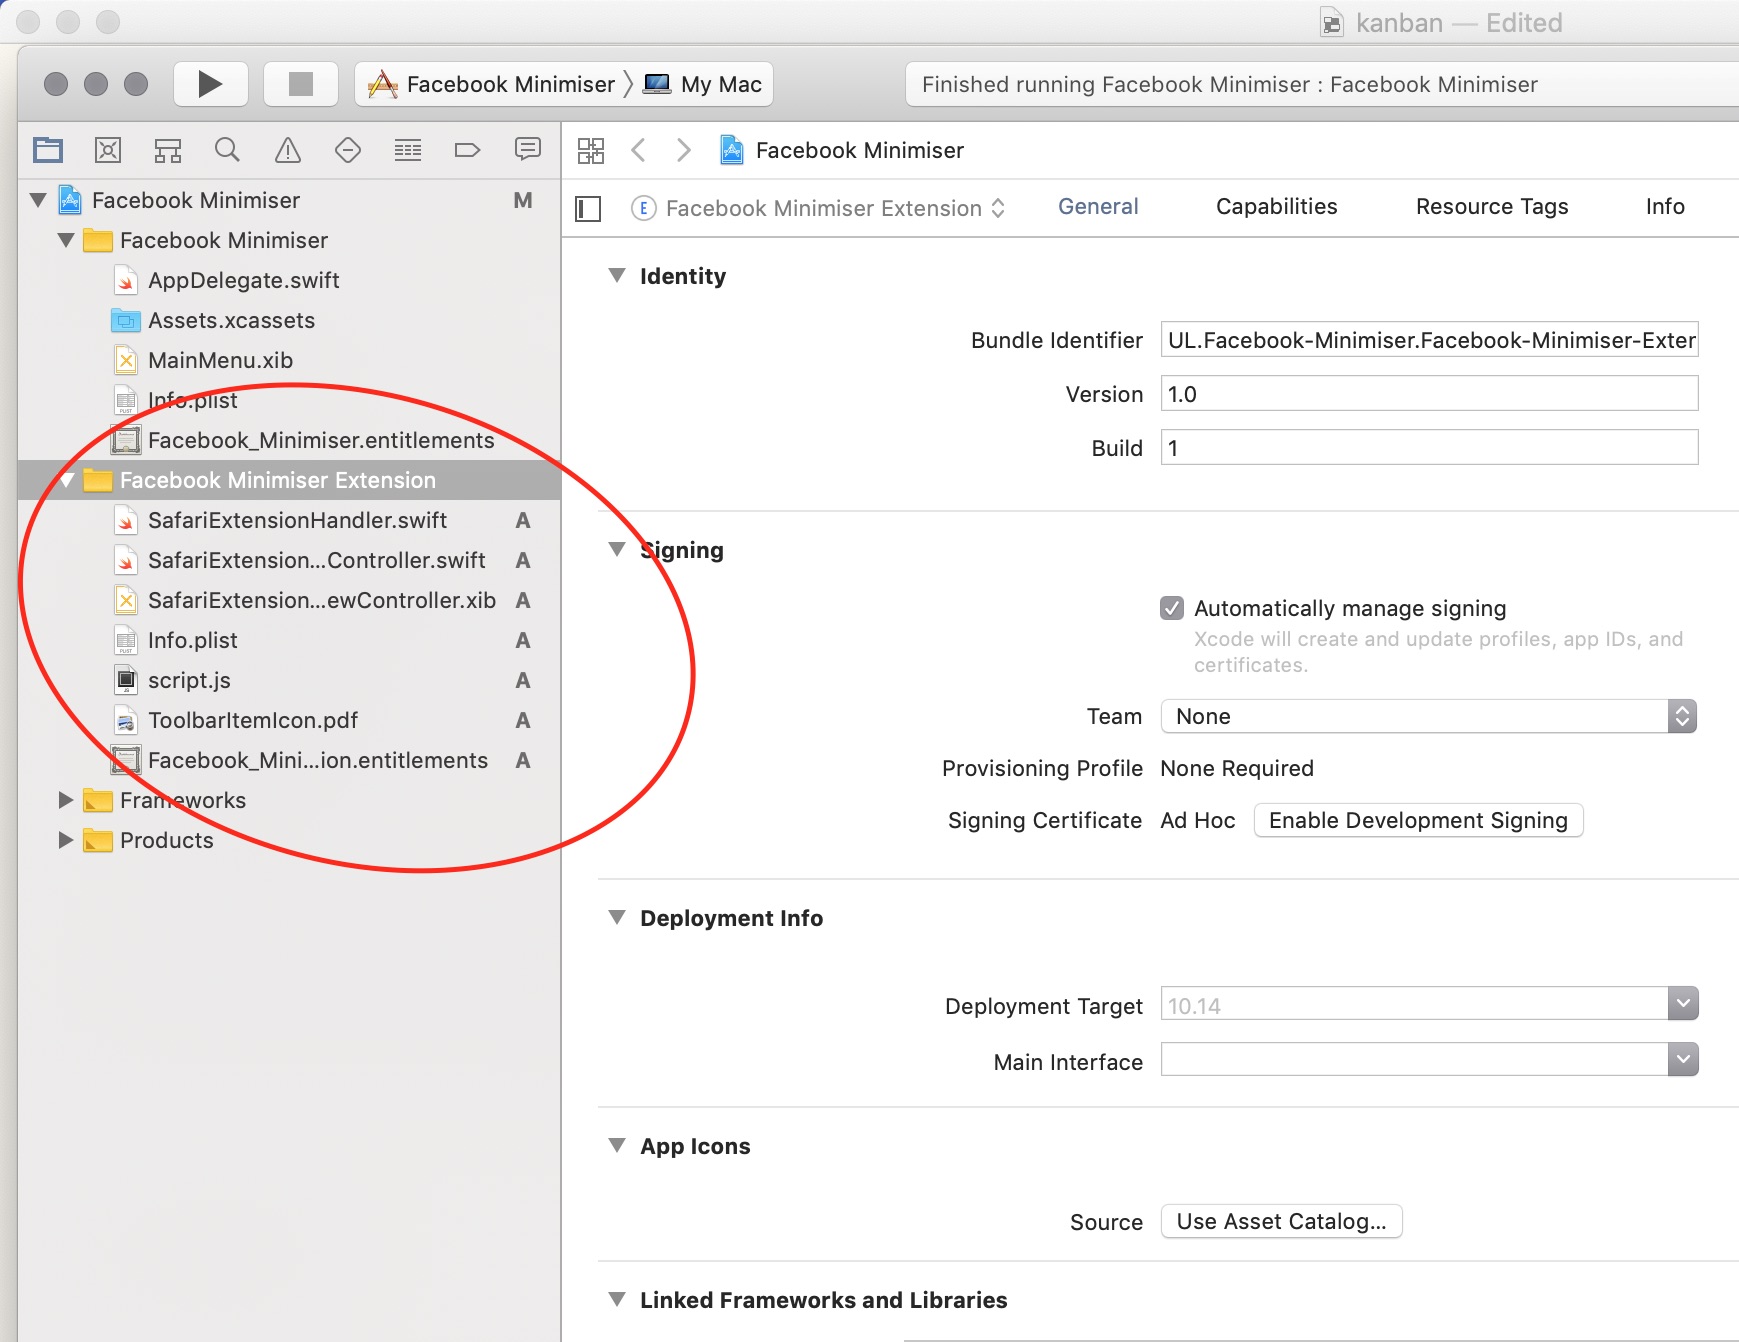
Extension added
Step 4: Try building the empty extension and enable it in Safari
If you click the ‘play’ triangle icon in the top left, the app will again be built and run.
Apple tells us that
When you build your app, Xcode builds your Safari App Extension first, then embeds it inside the finished app bundle. As soon as your app runs, your extension is ready for use in Safari.
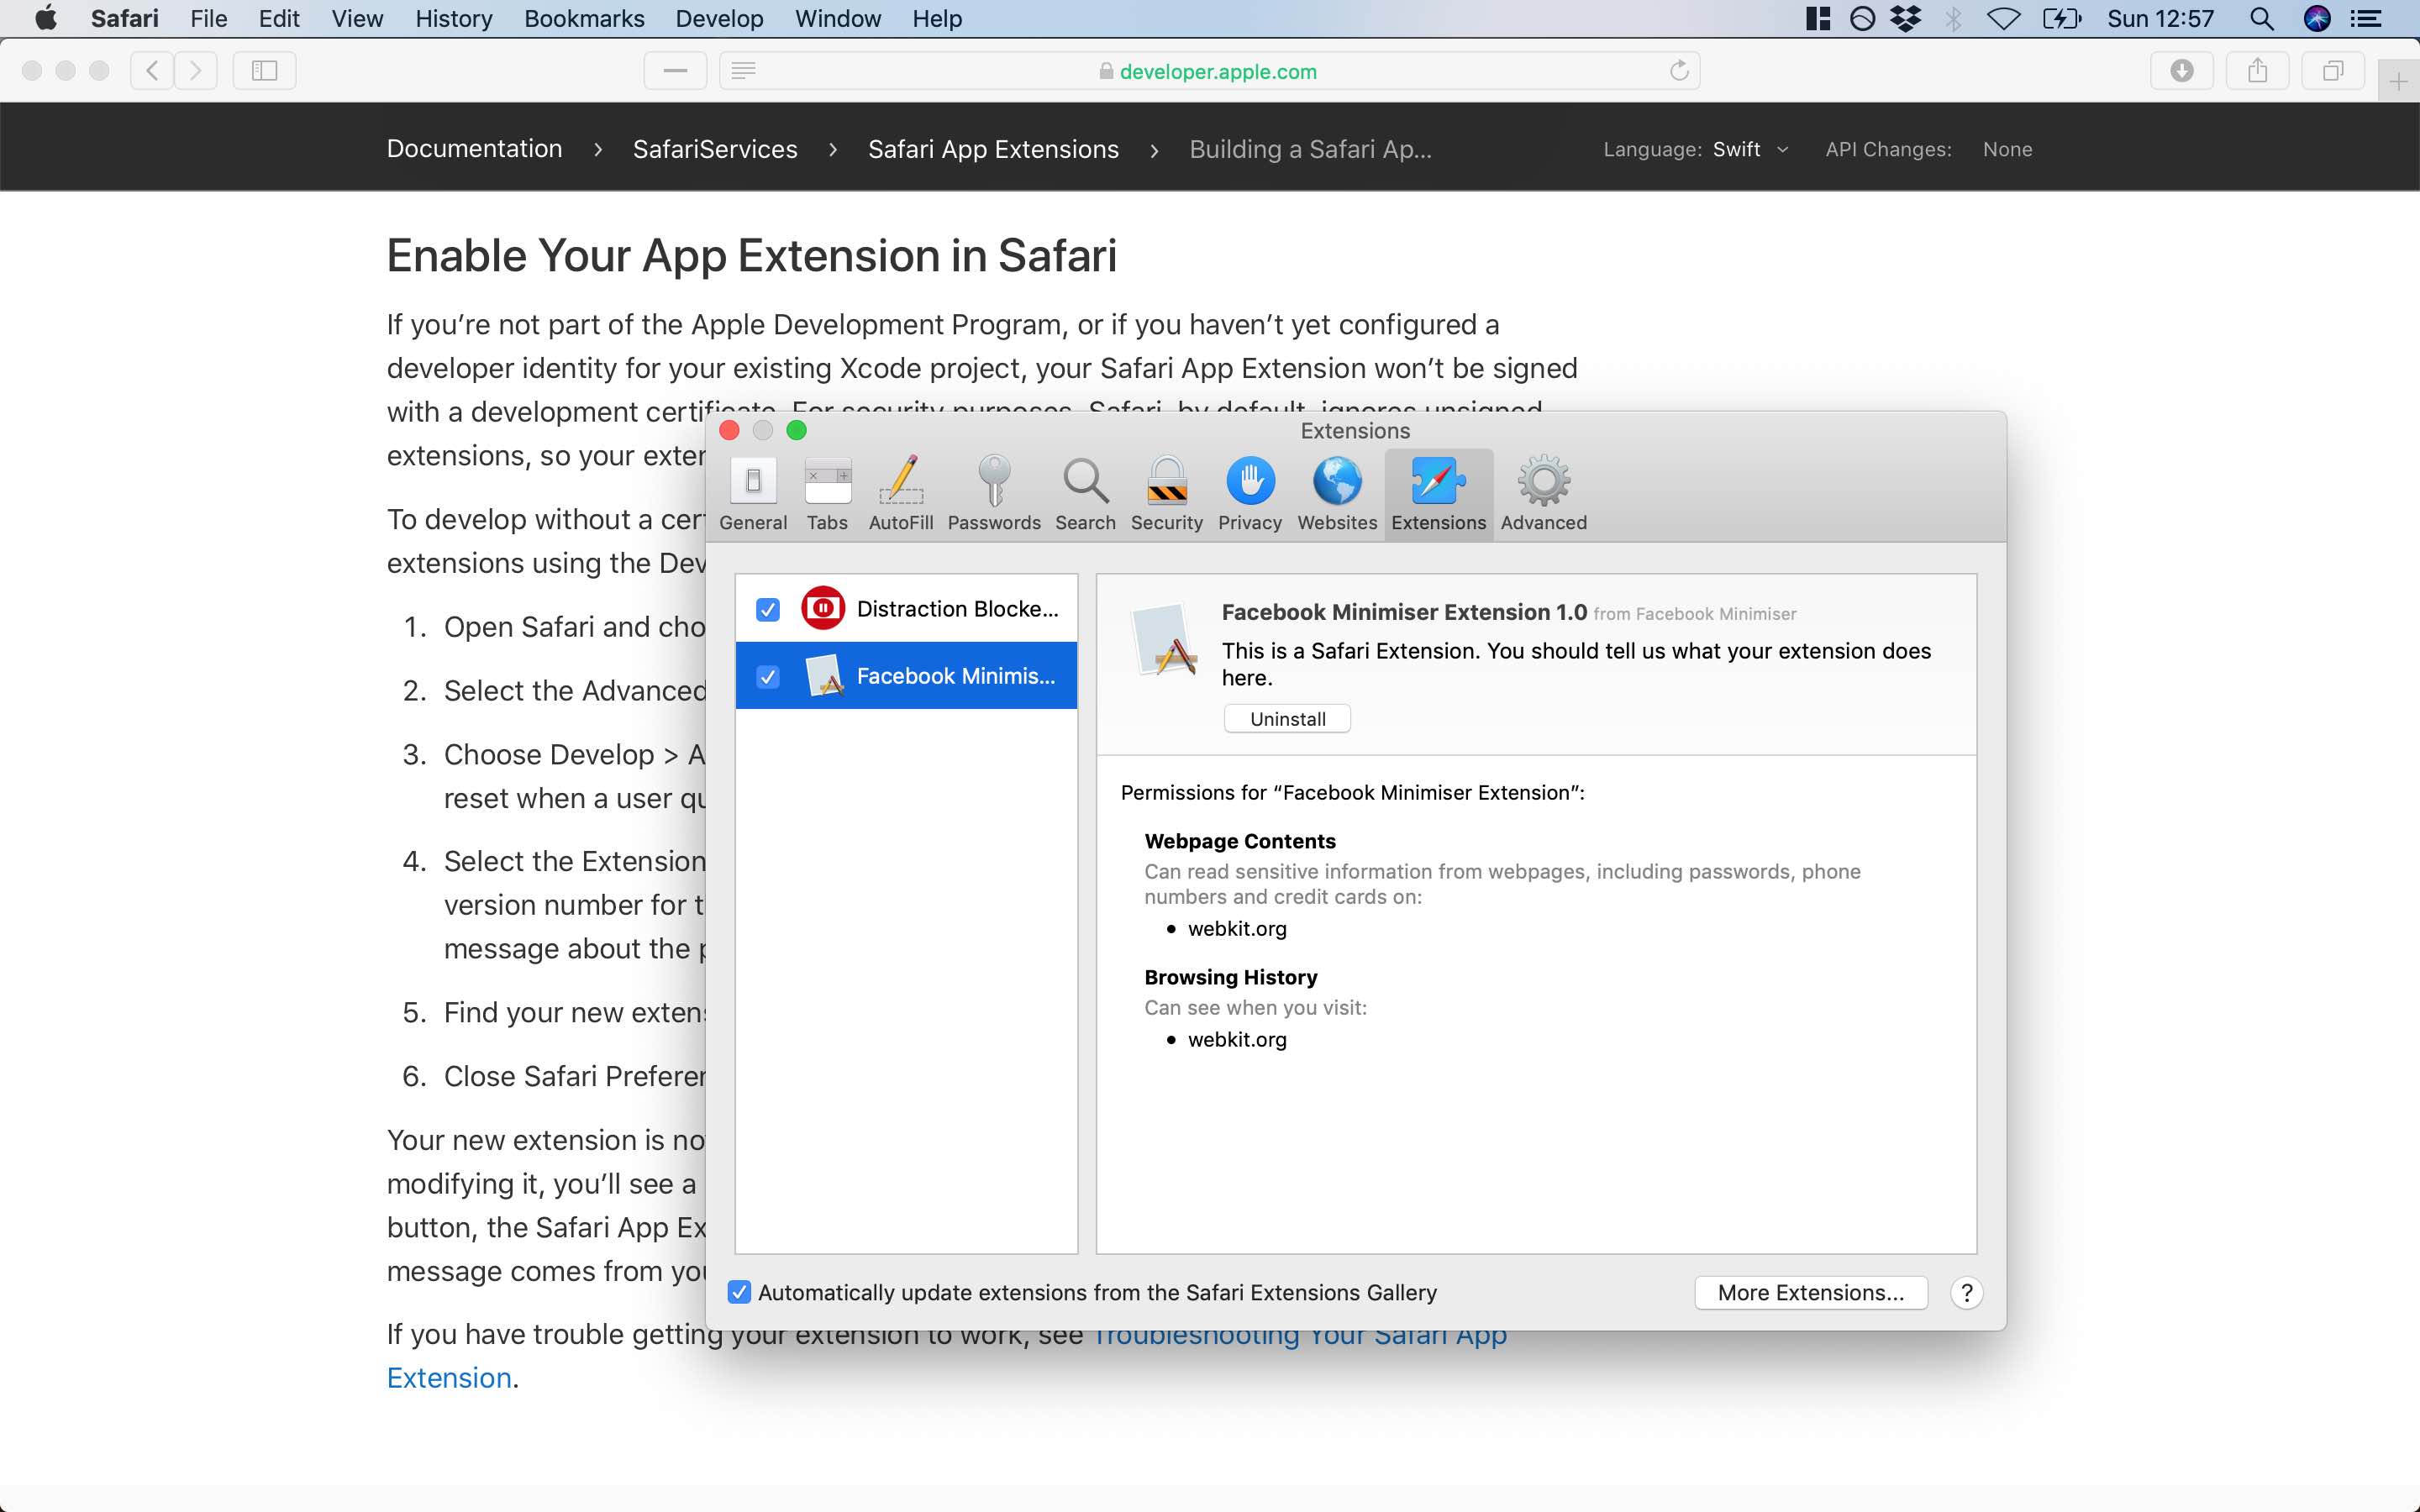
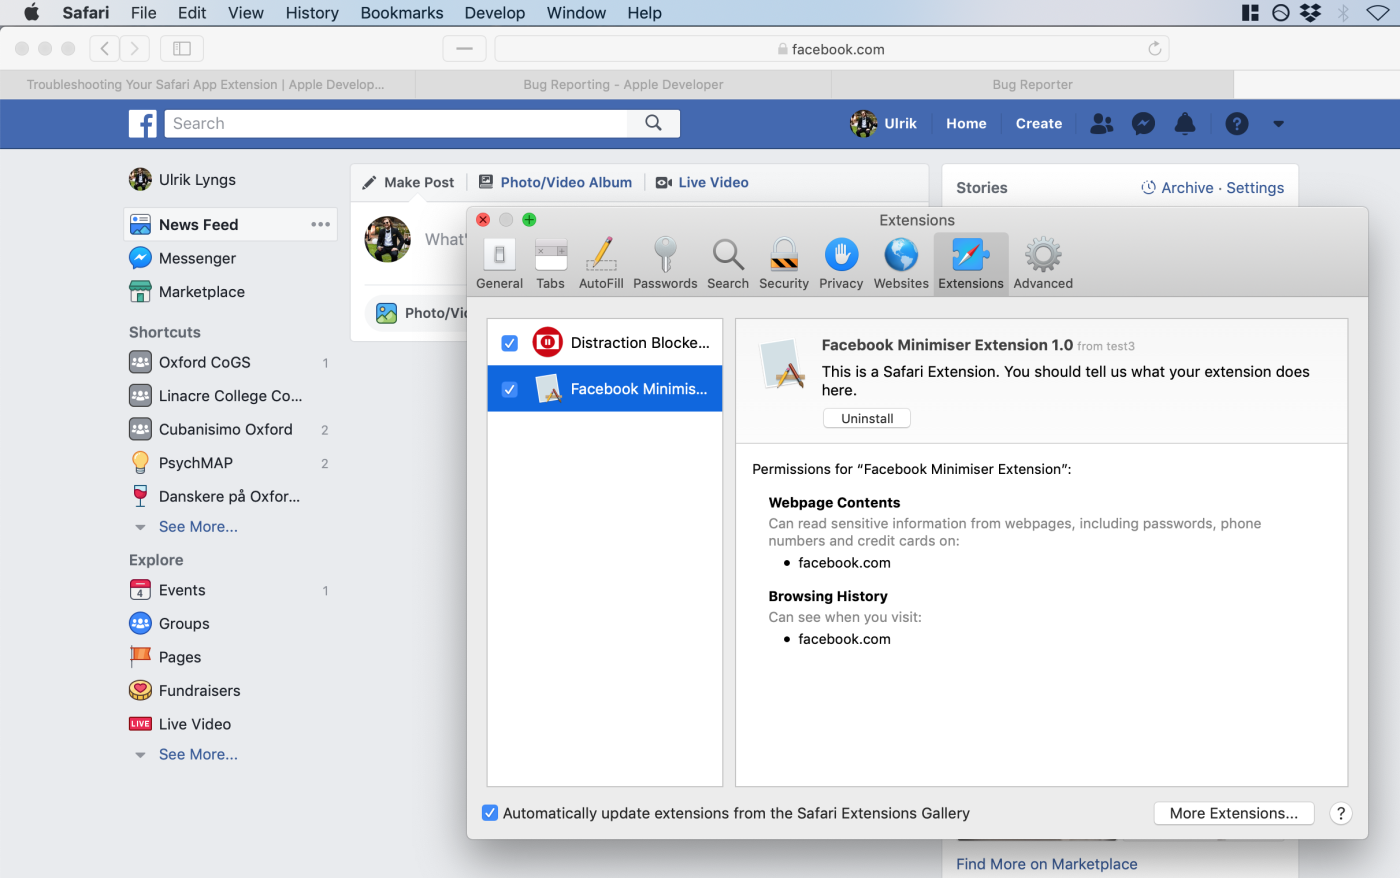
Let’s go over to Safari, then go to Safari > Preferences. Click the ‘Extensions’ pane.
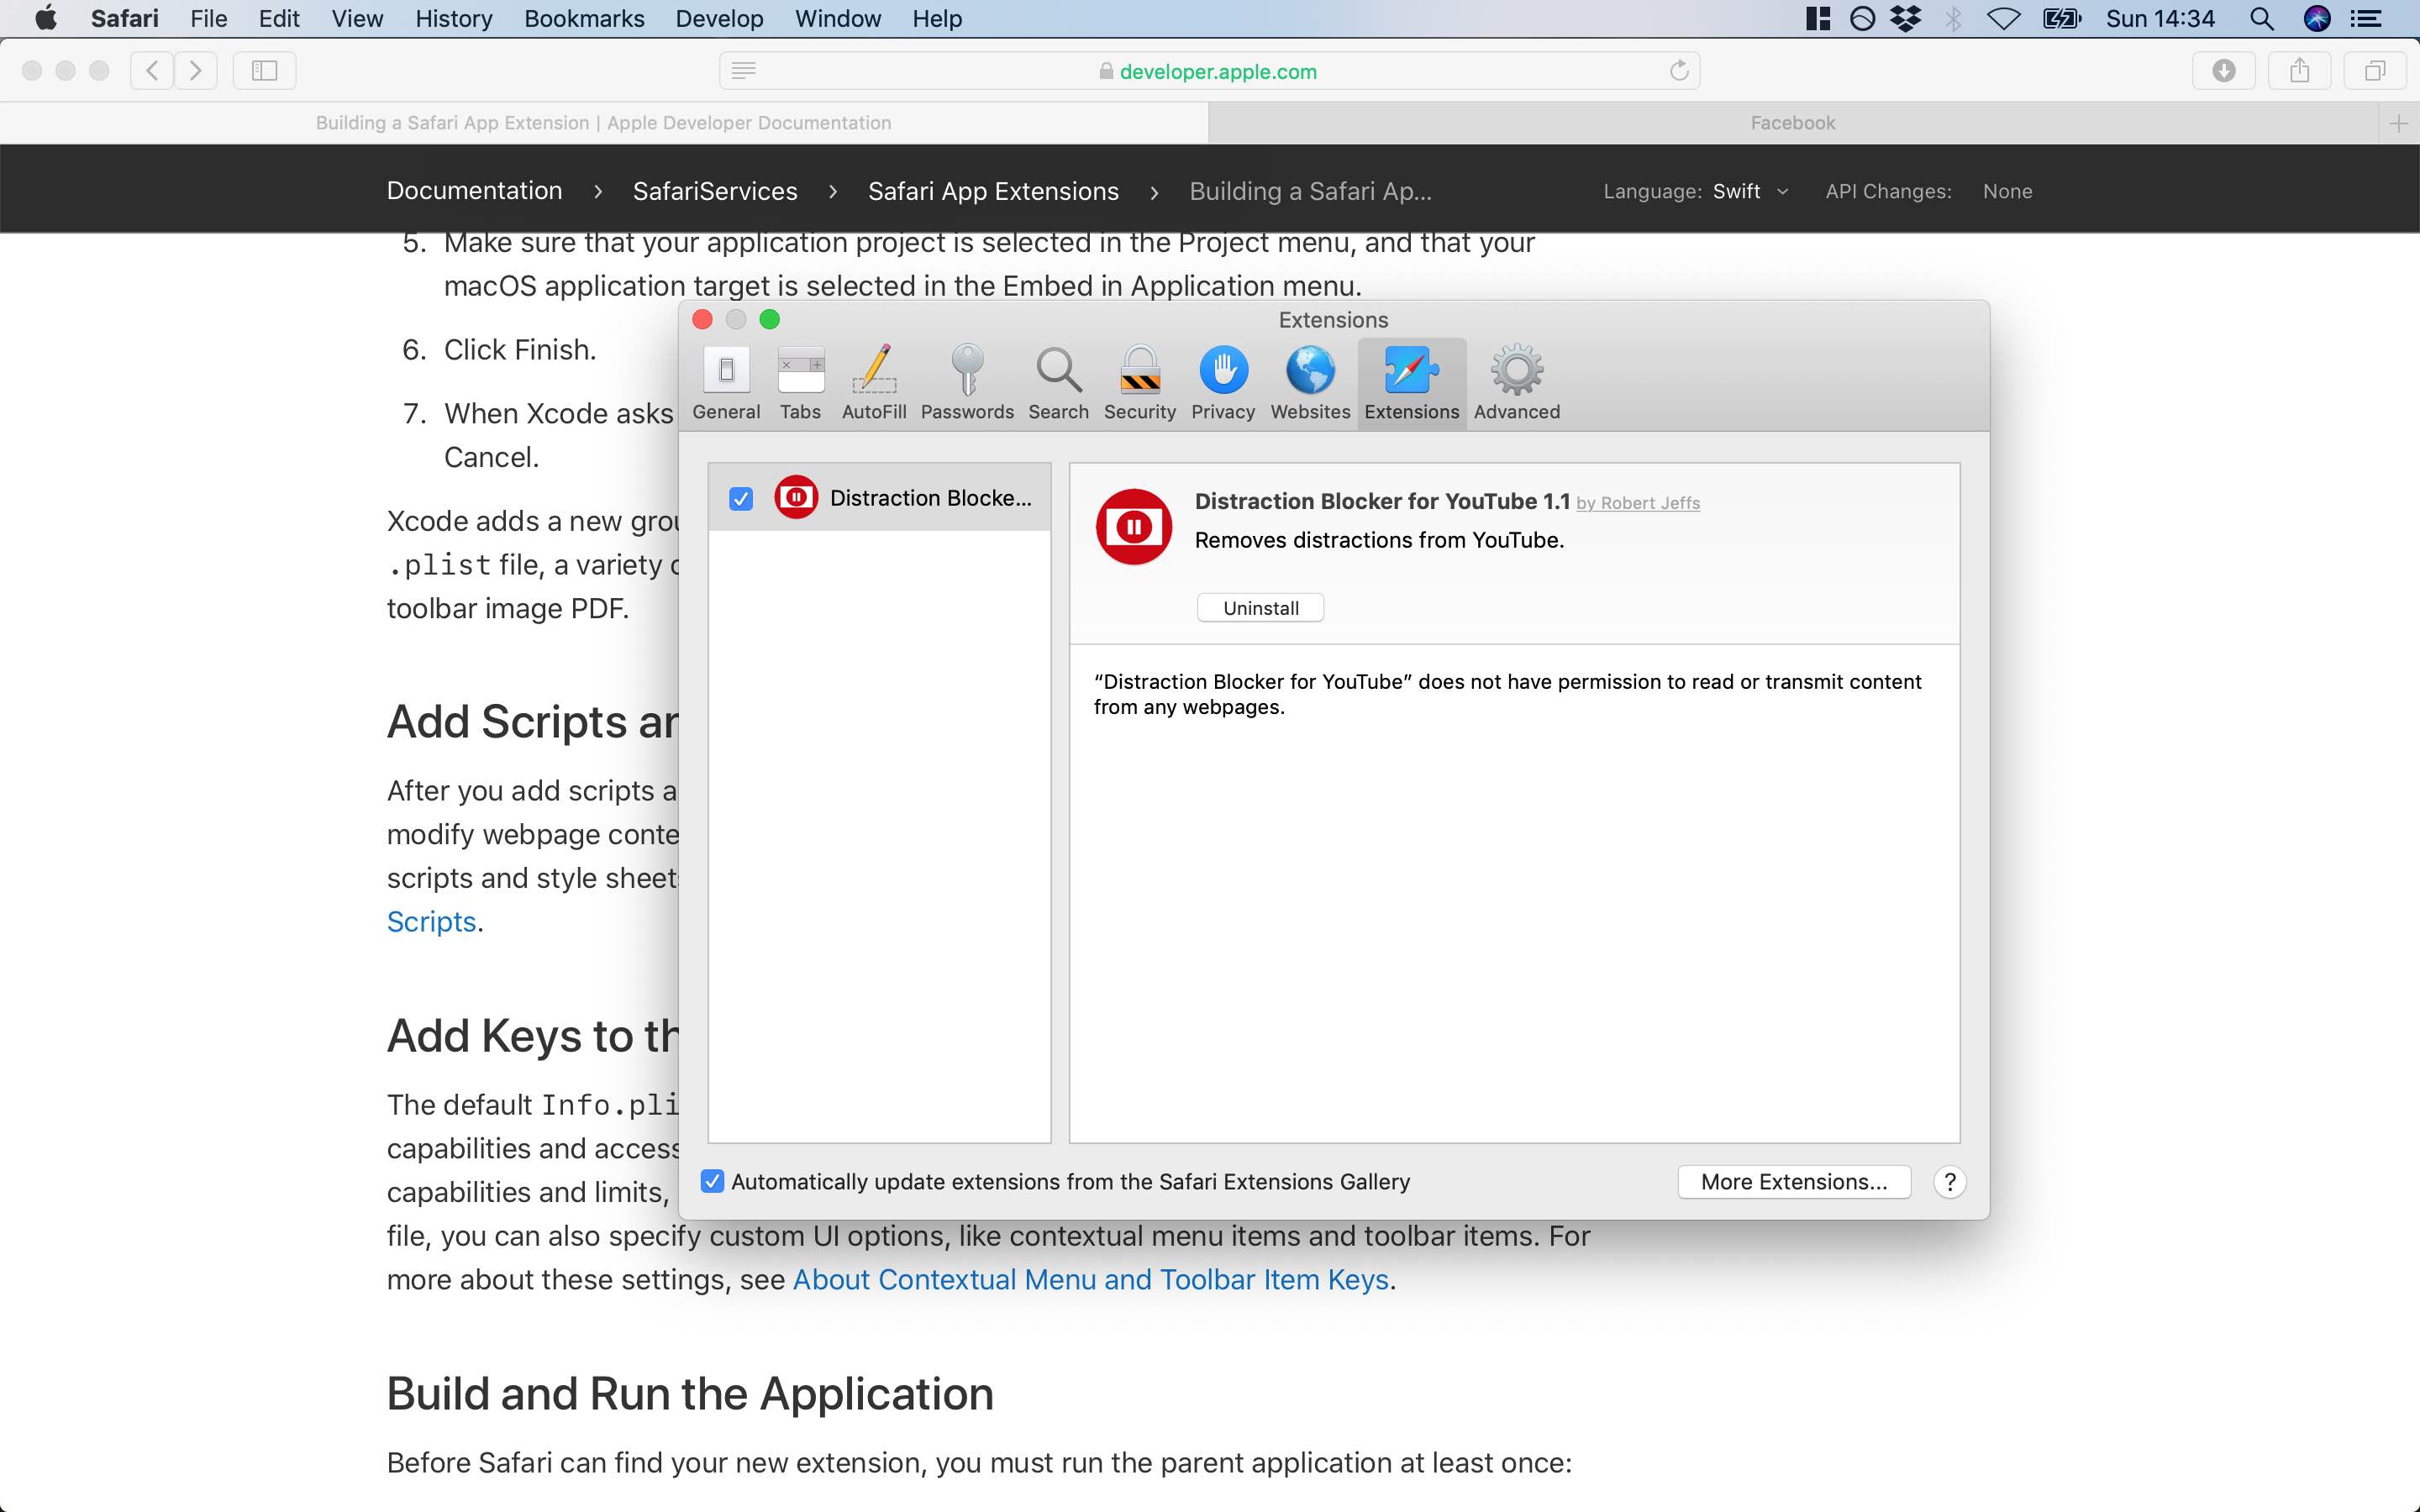
Safari preferences extensions pane
Uh-oh - where’s our extension? Turns out that unless we sign our extension with a developer certificate, it won’t automatically appear. If you haven’t already turned on the Development menu in Safari, go to Safari > Preferences > Advanced, then tick ‘Show Develop menu in menu bar’.
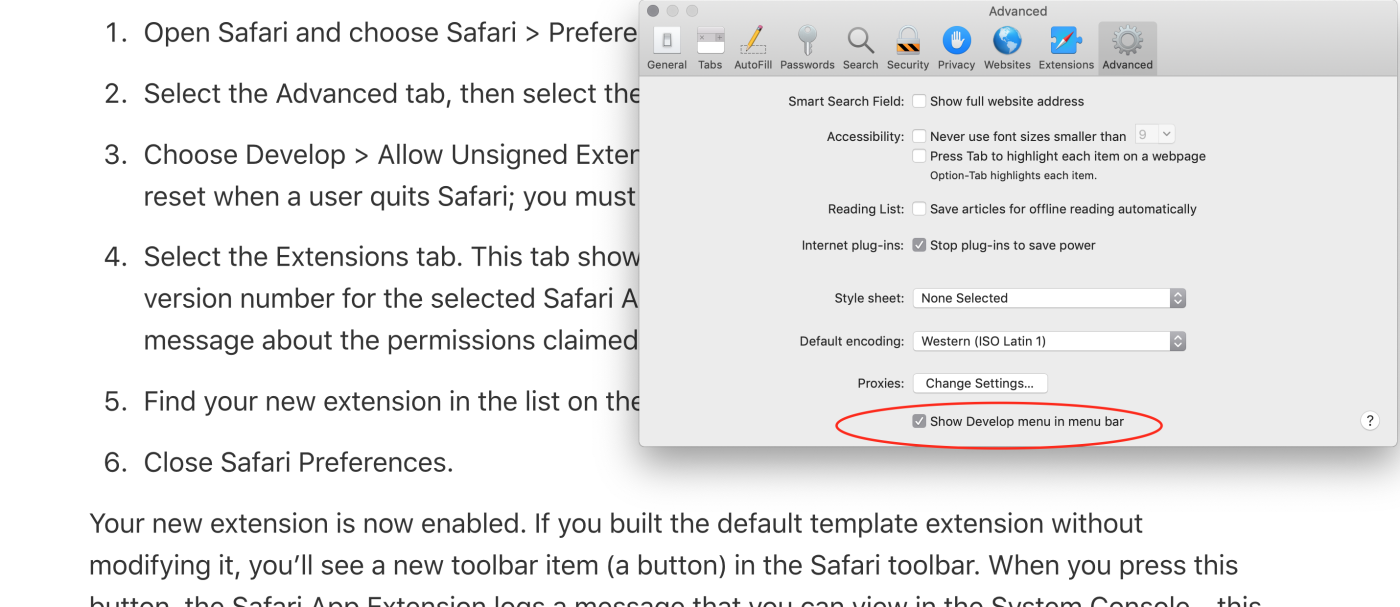
Adding Develop menu
Now go to ‘Develop’ in the top menu, click ‘Allow Unsigned Extensions’ and type in your password.
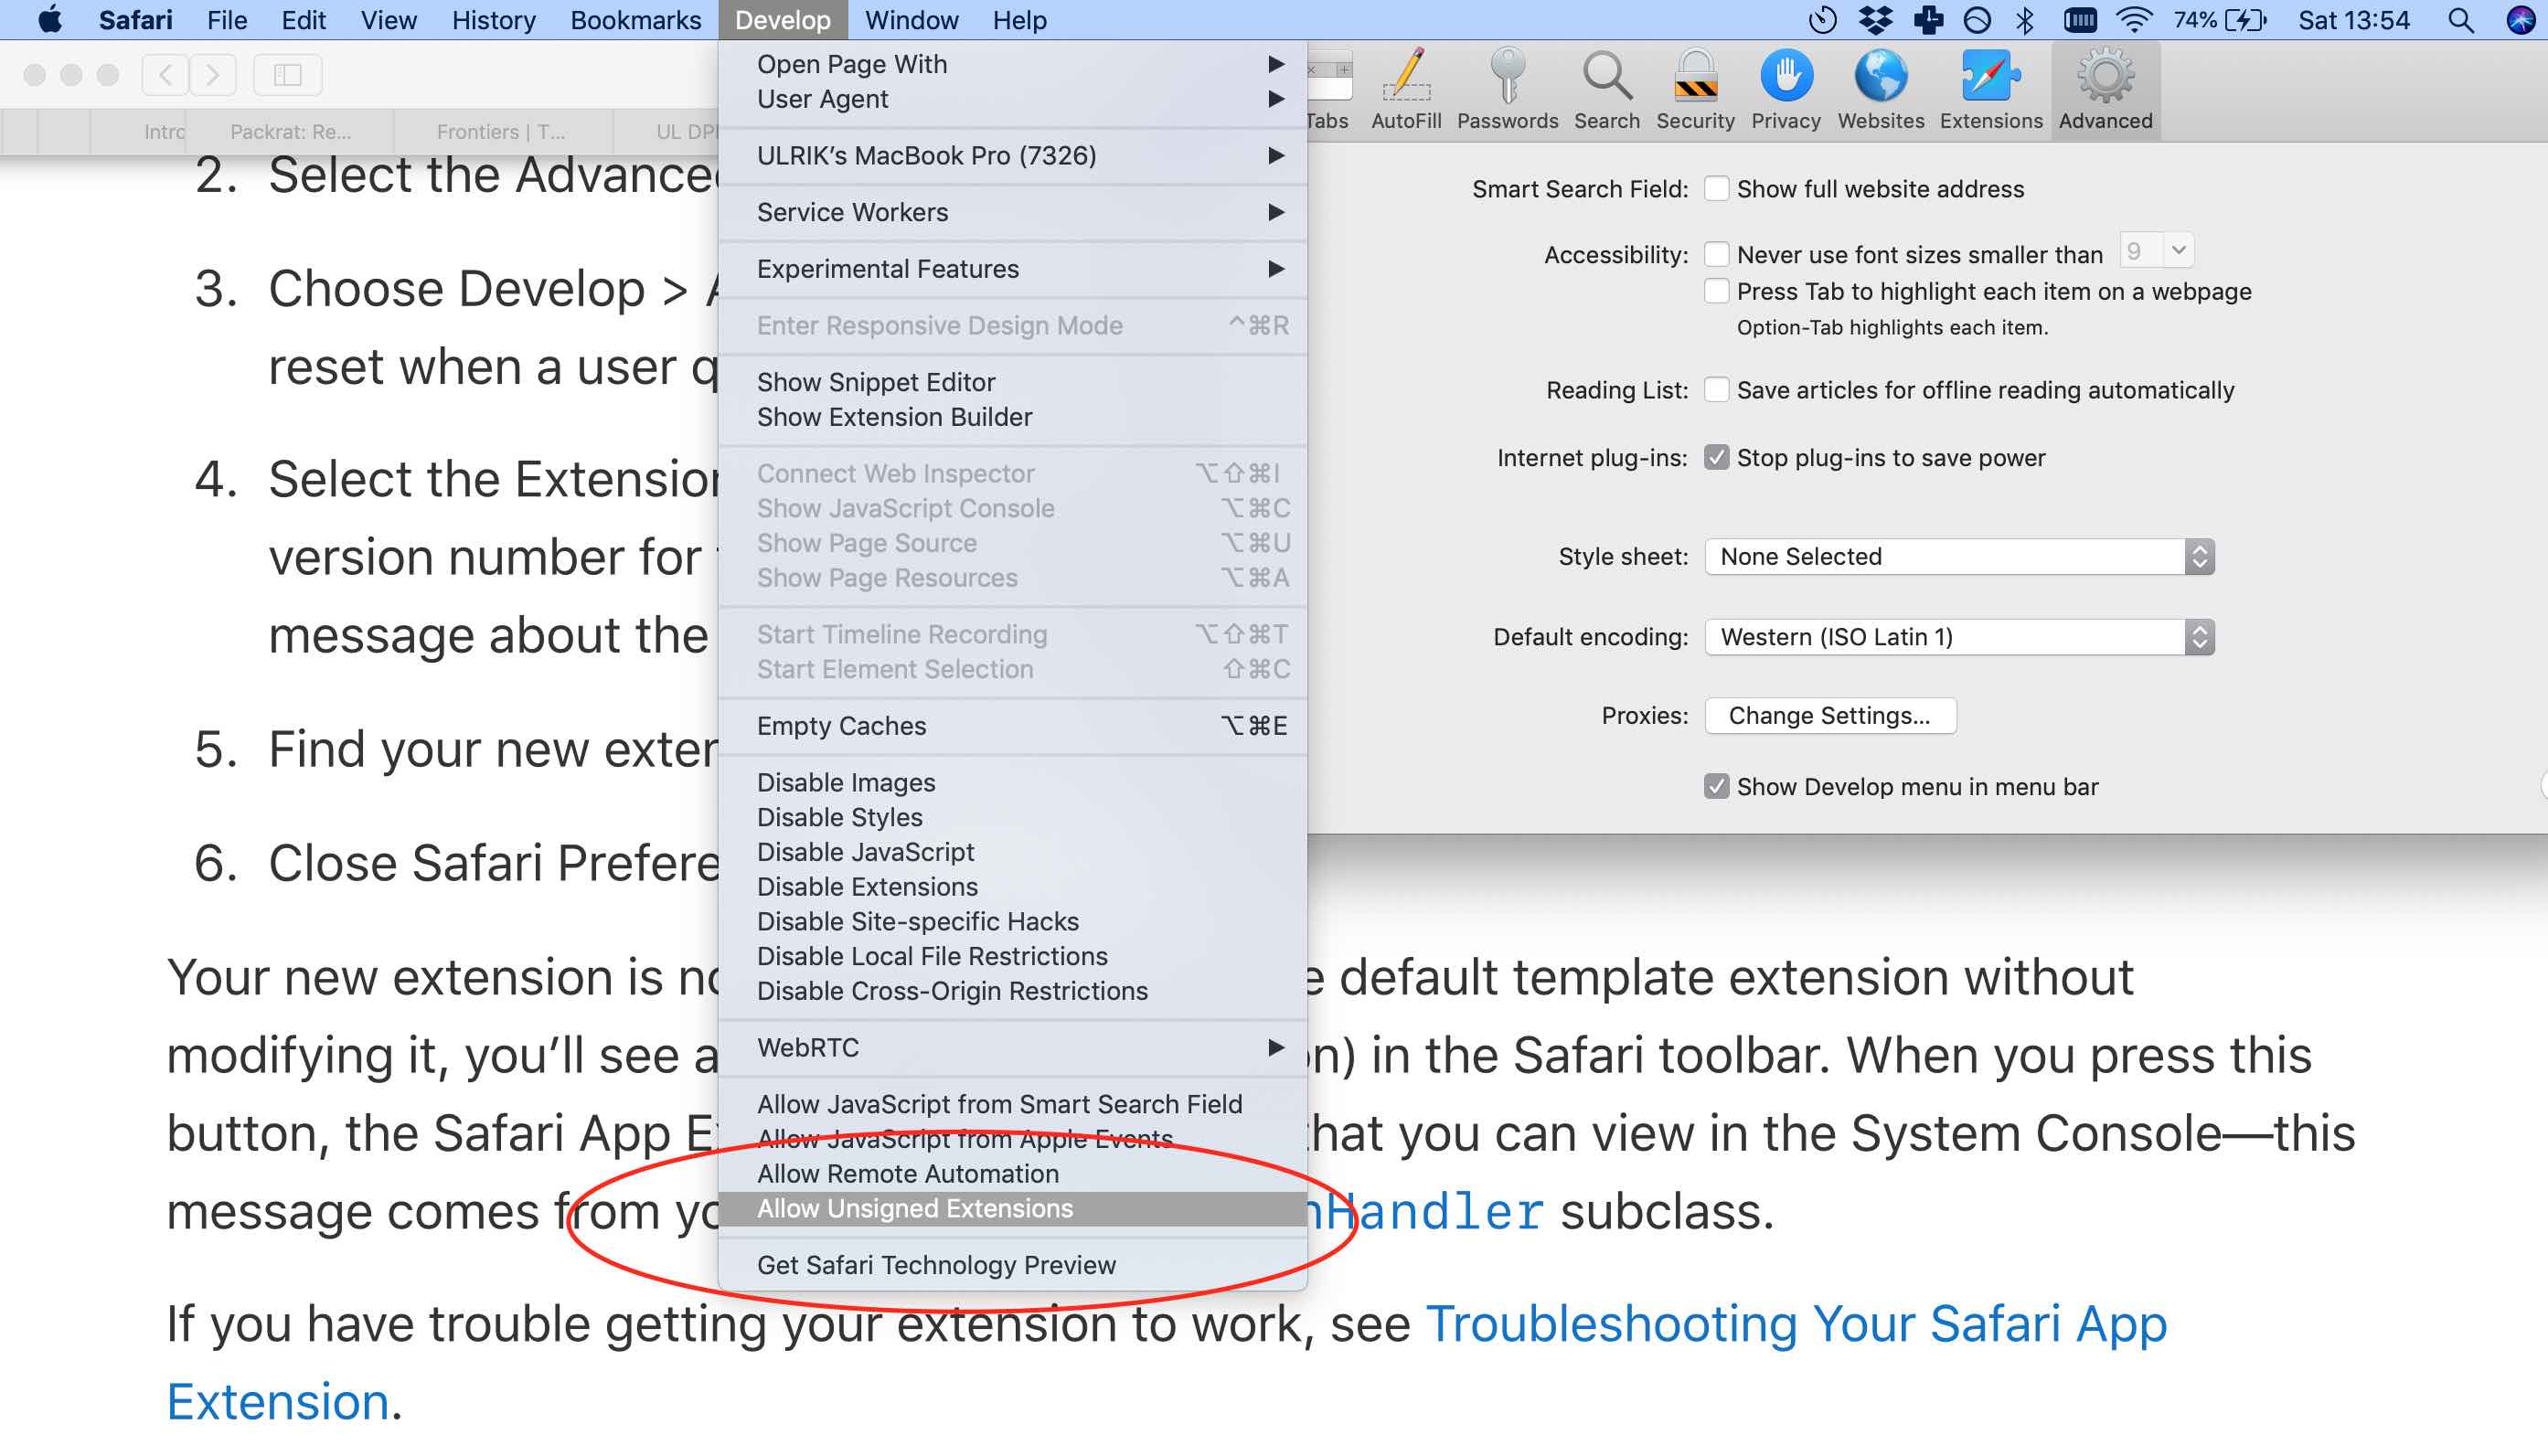
Allowing unsigned extensions
Hooray, now our extension shows up! If we tick to enable it, we see its icon in the toolbar:
Enabling the extension
Step 5: Injecting a style sheet
Create the style sheet file
The extension doesn’t do anything yet. Go back to Xcode and create a new file by right-clicking the ‘Facebook Minimiser Extension’ folder:
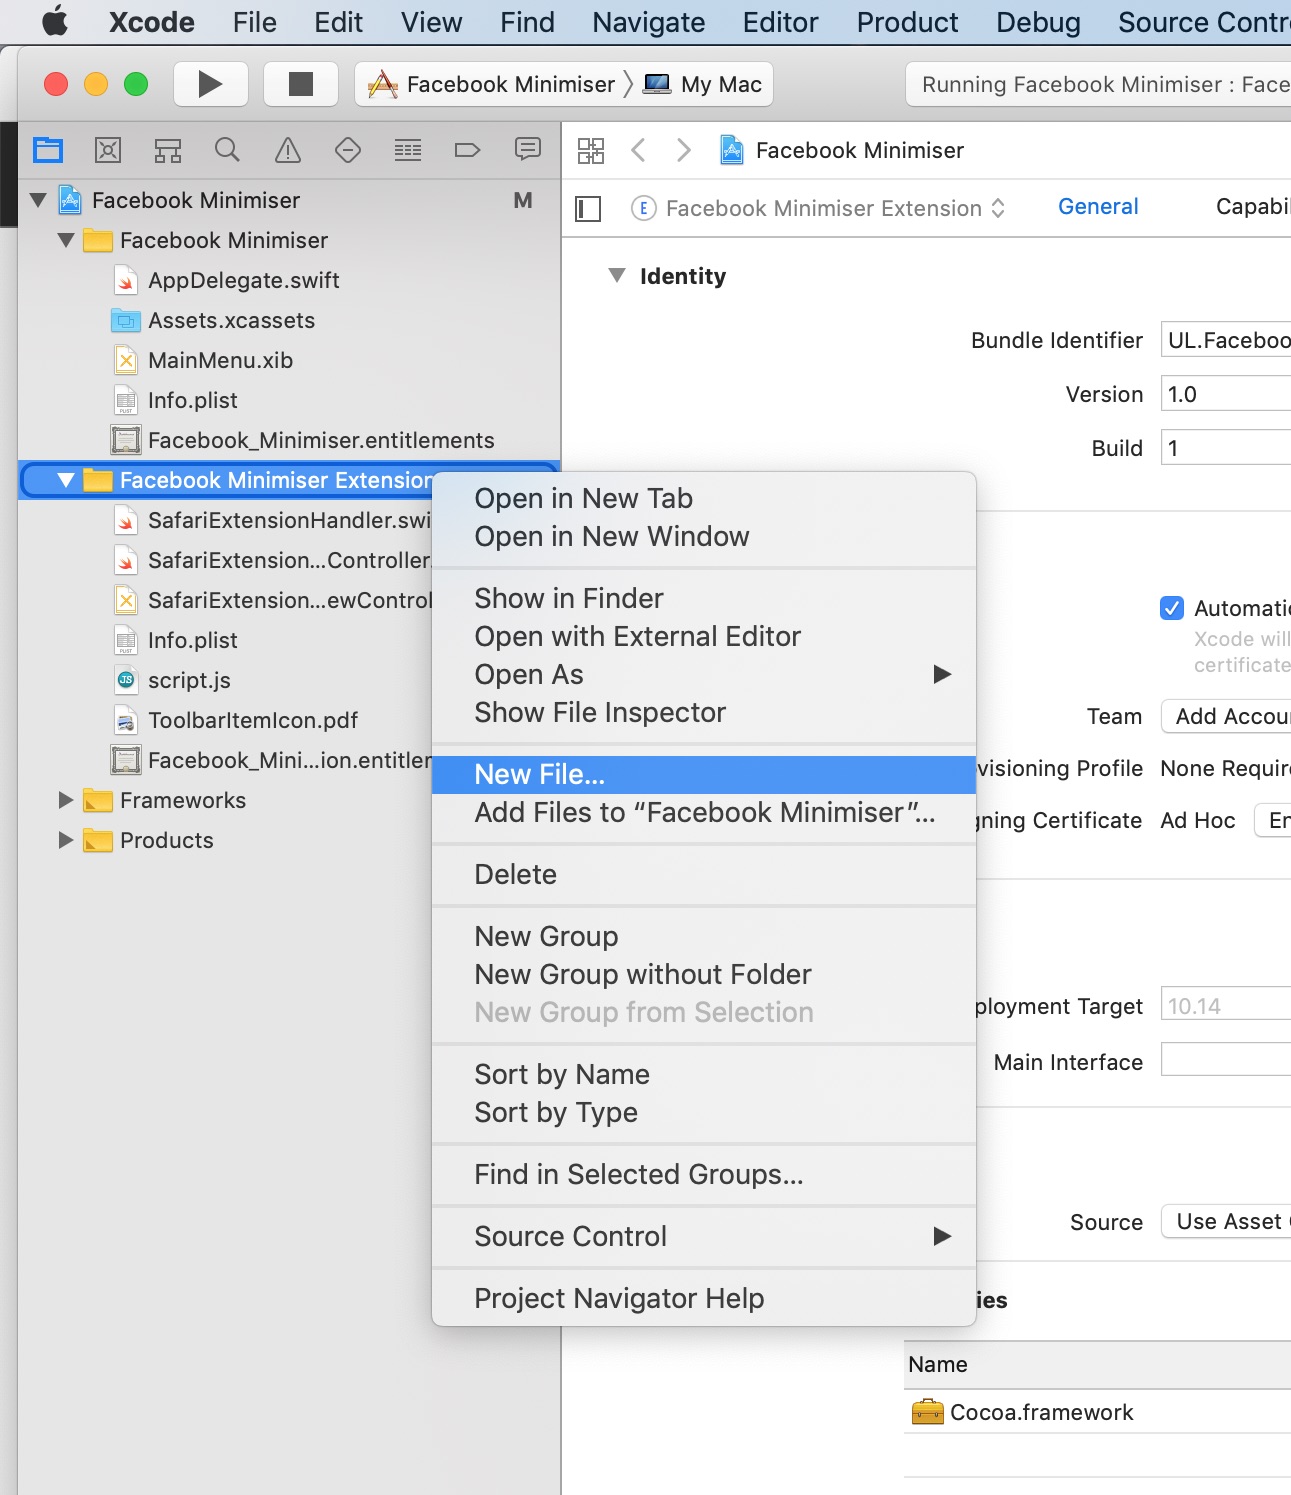
Adding file
Select ‘Empty’ and click ‘next’:
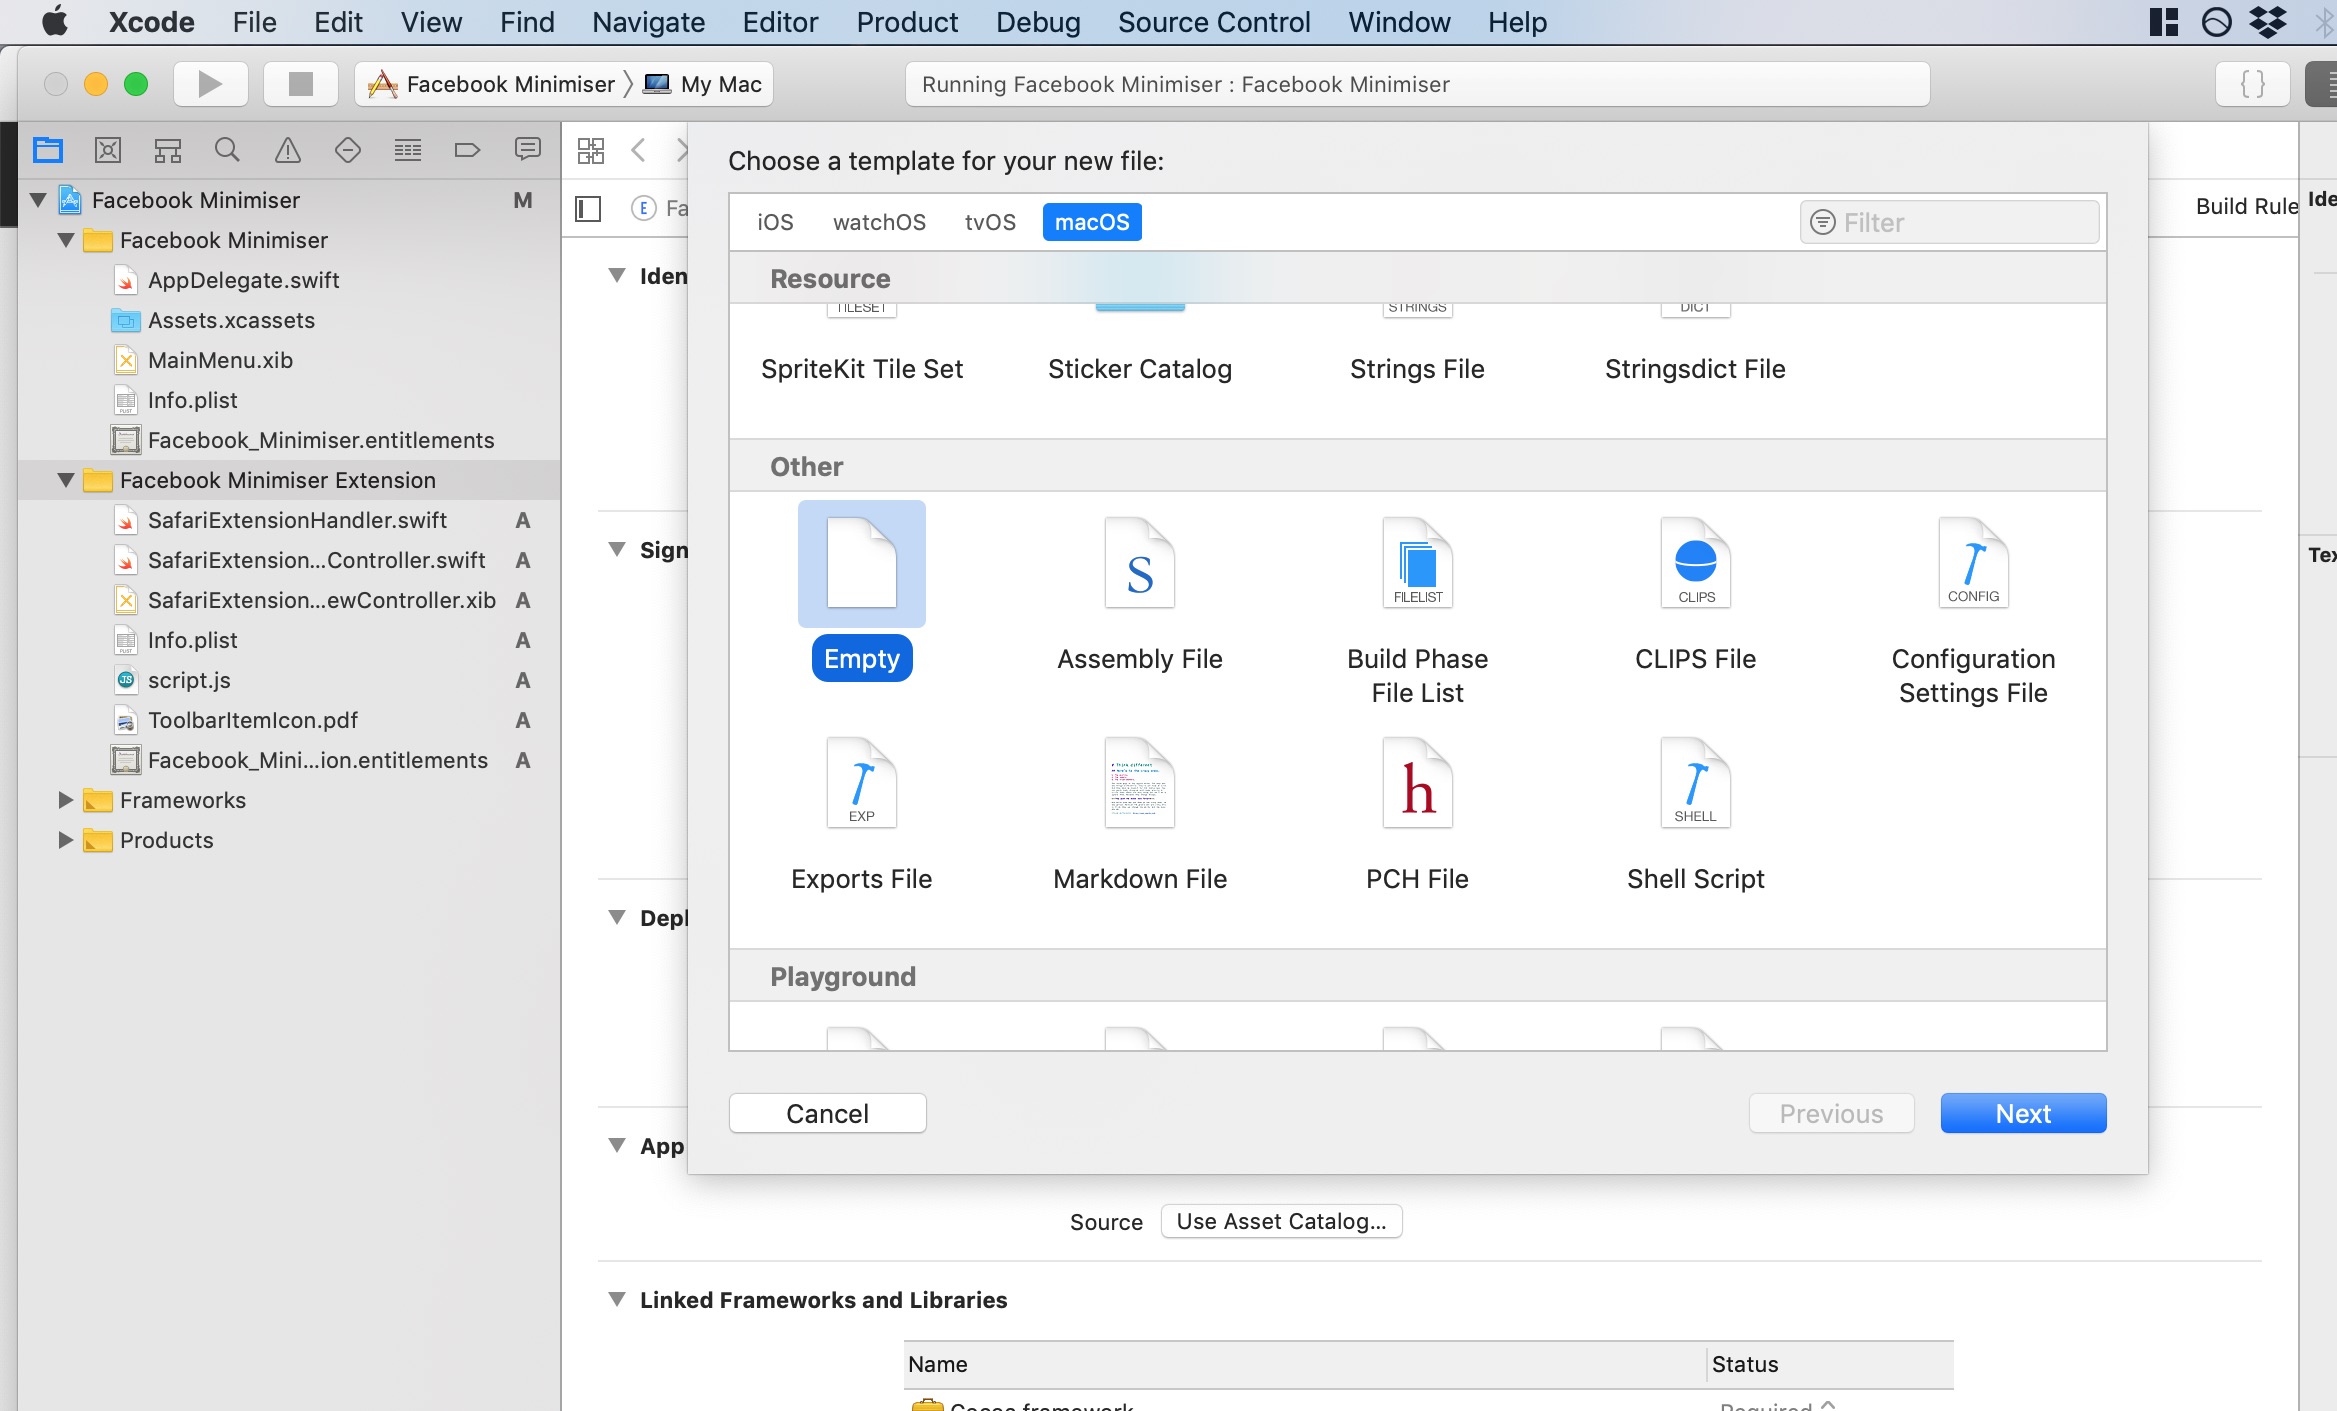
Choosing file type
Let’s name our stylesheet style.css, set the target to ‘Facebook Minimiser Extension’, then click ‘create’:
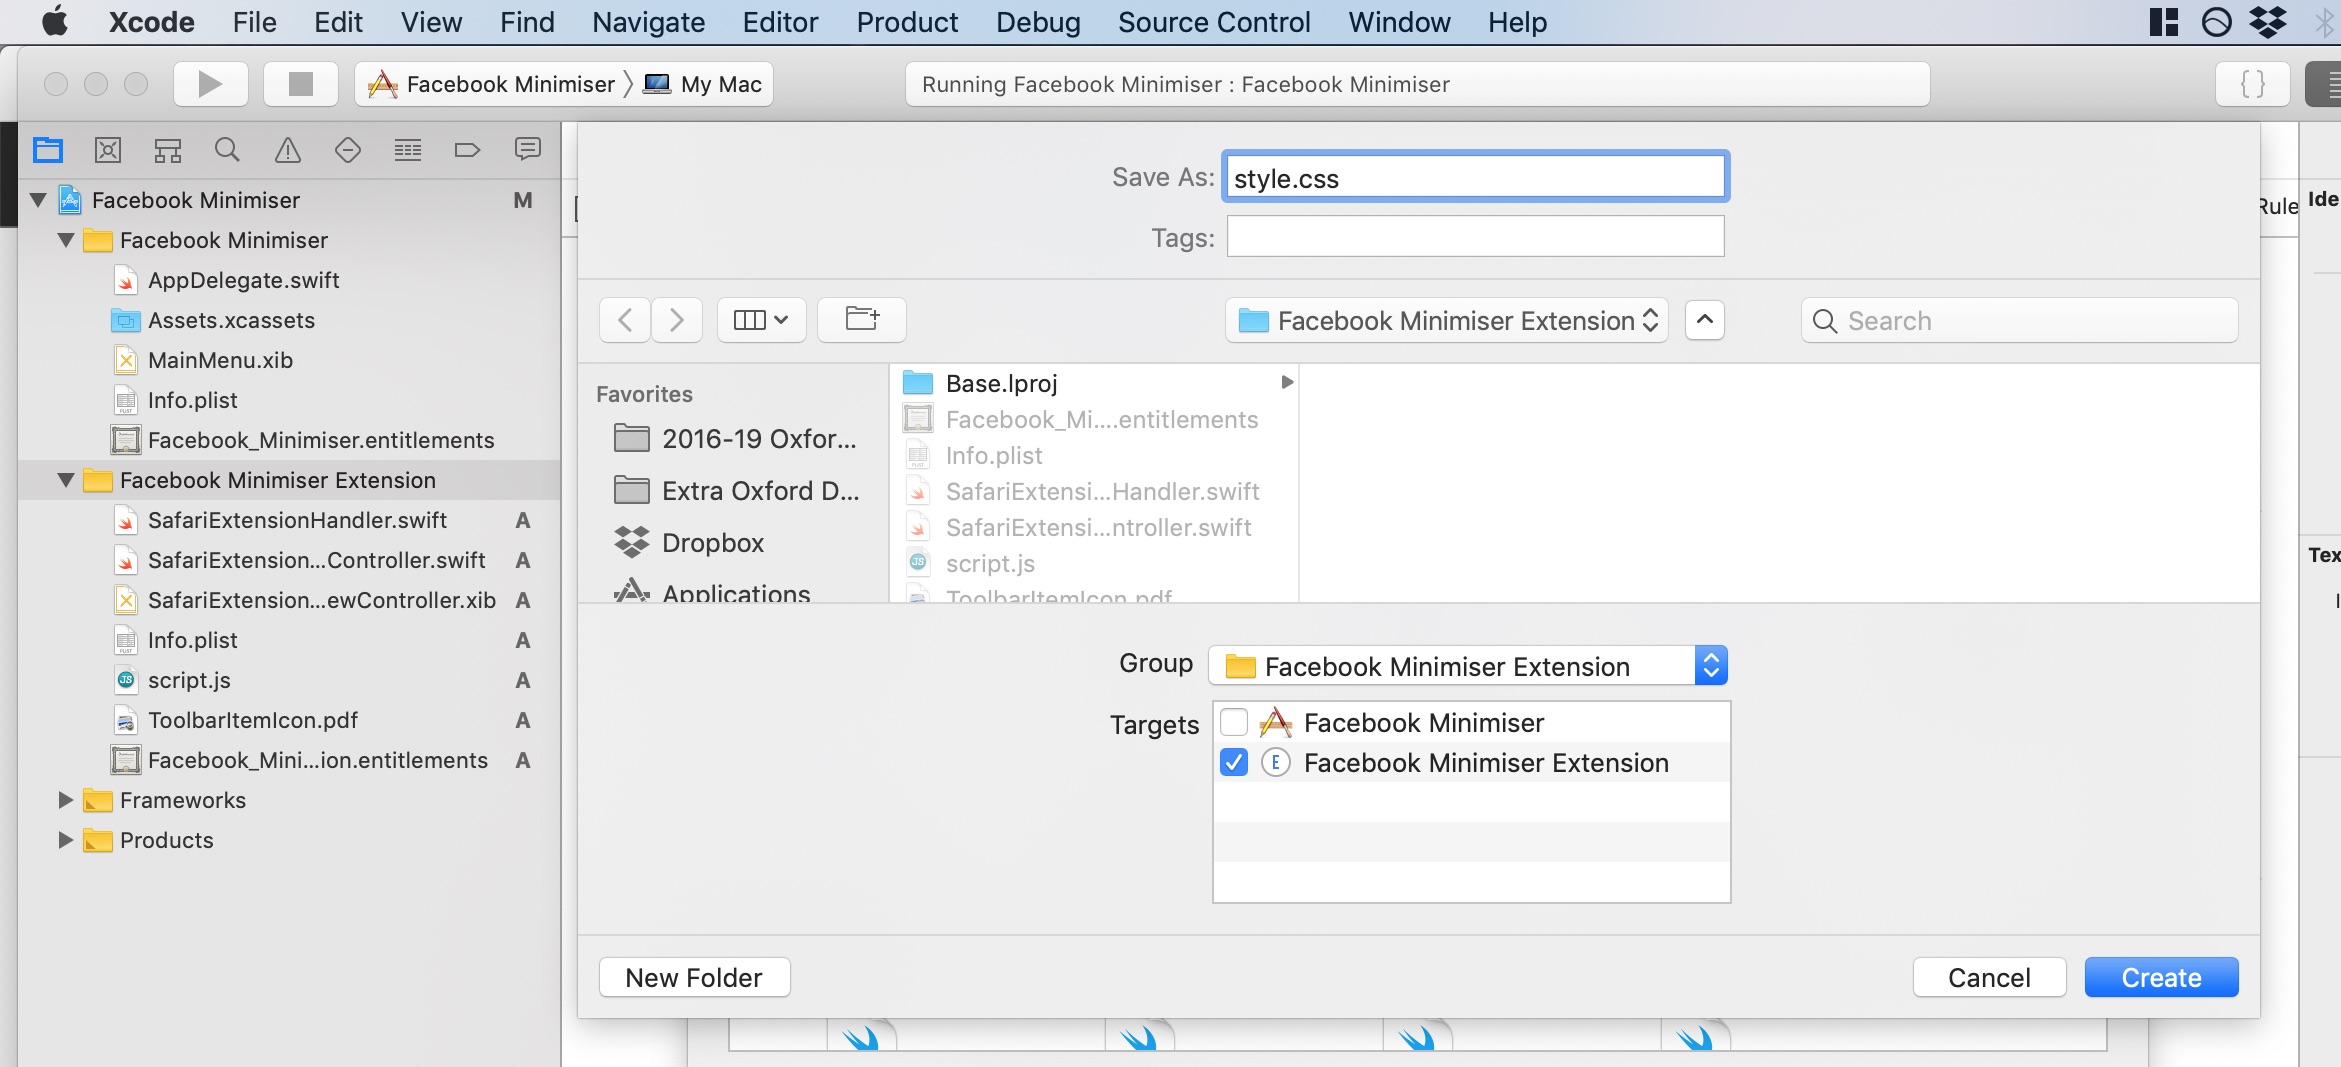
Naming file and choosing target
As an initial test, let’s hide the news feed. In Safari, navigate to Facebook, right click on the page, select ‘Inspect Element’, and find the id or class of the element that contains the feed:
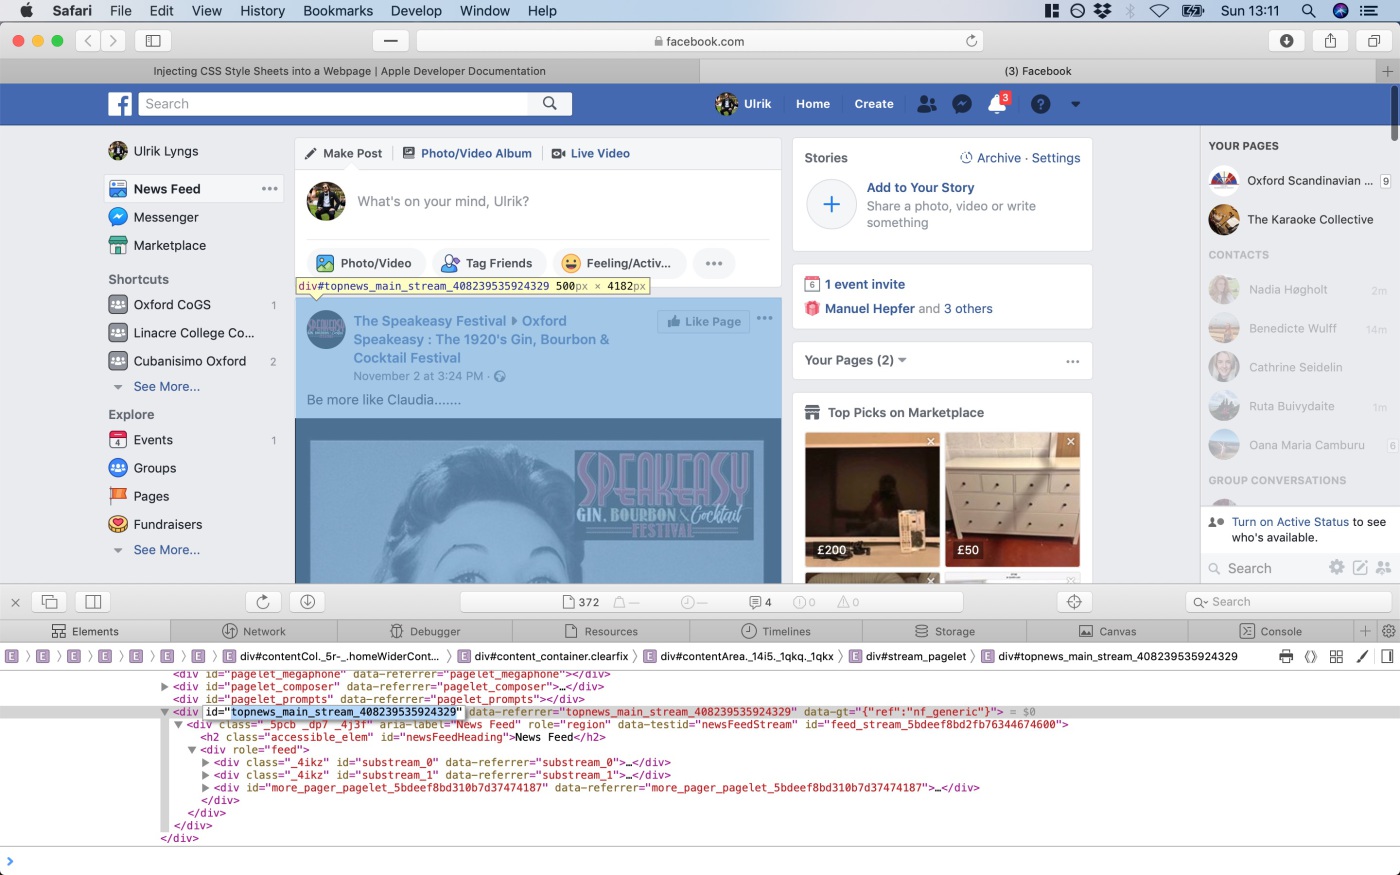
Inspecting Facebook HTML
Now go back to Xcode and add this corresponding CSS code to style.css:
#topnews_main_stream_408239535924329
{
    display: none !important;
}
Updating style.css to hide news feed
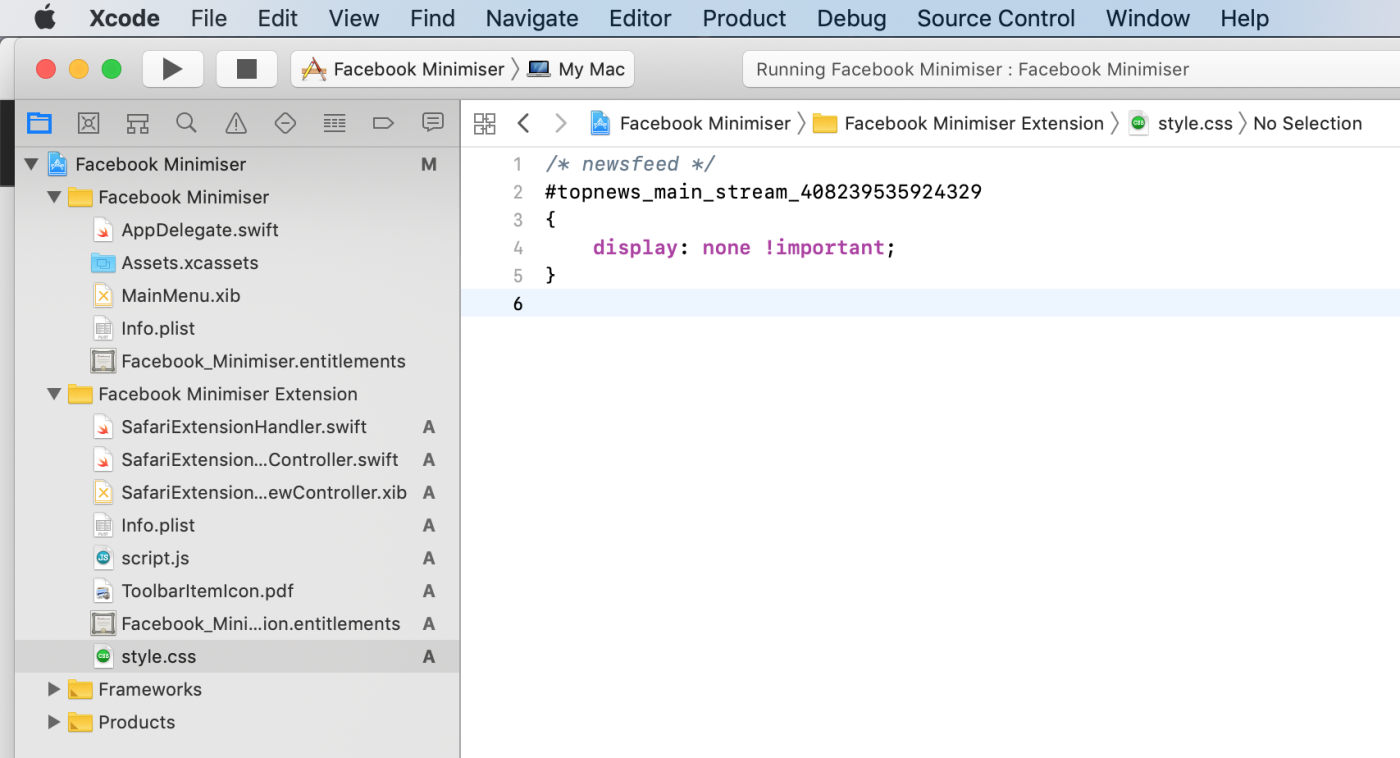
Include the style sheet file in the extension’s Info.plist file
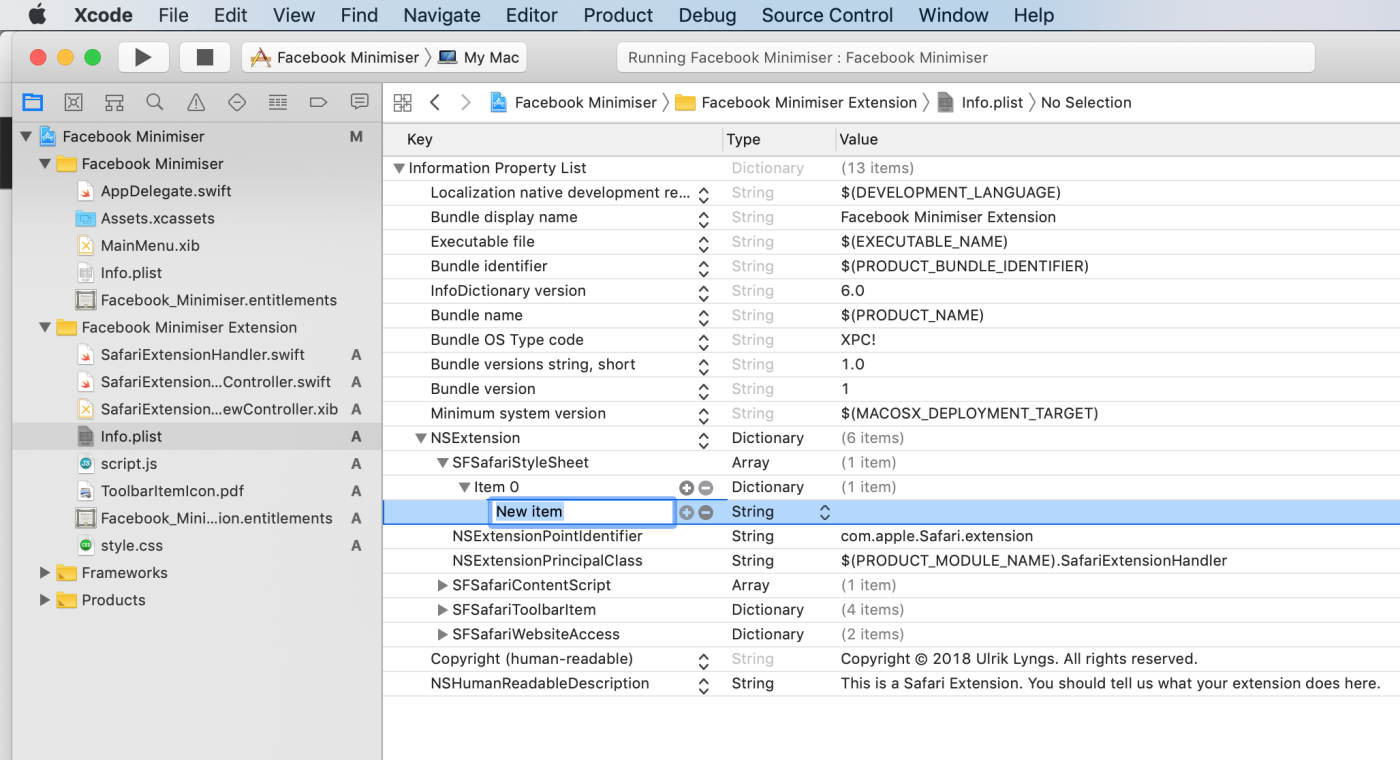
In the ‘Facebook Minimiser Extension’ folder, click the **Info.plist* file. Expand the ‘NSExtension’ element and click the plus icon to add a new element 1:
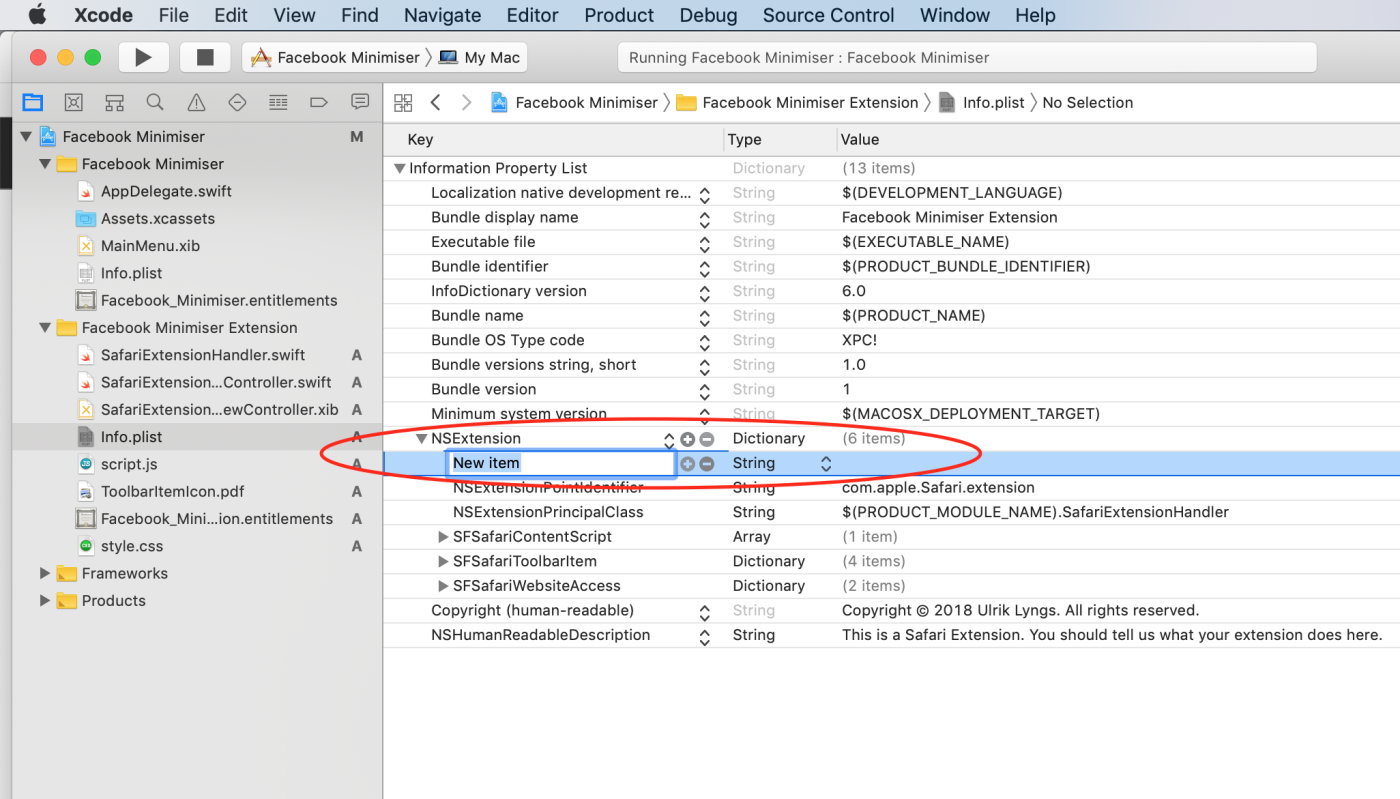
Add element to NSExtension in Info.plist
Name this element ‘SFSafariStyleSheet’ and set its type to ‘Array’. Expand the element and click the plus icon to add a new element:
Specify array ‘SFSafariStyleSheet’
Set the type of this element to ‘Dictionary’, expand it and click the plus icon to add a new element:
Set to dictionary and add element
Name this element ‘Style Sheet’, leave its type as ‘String’, and give it the value ‘style.css’:
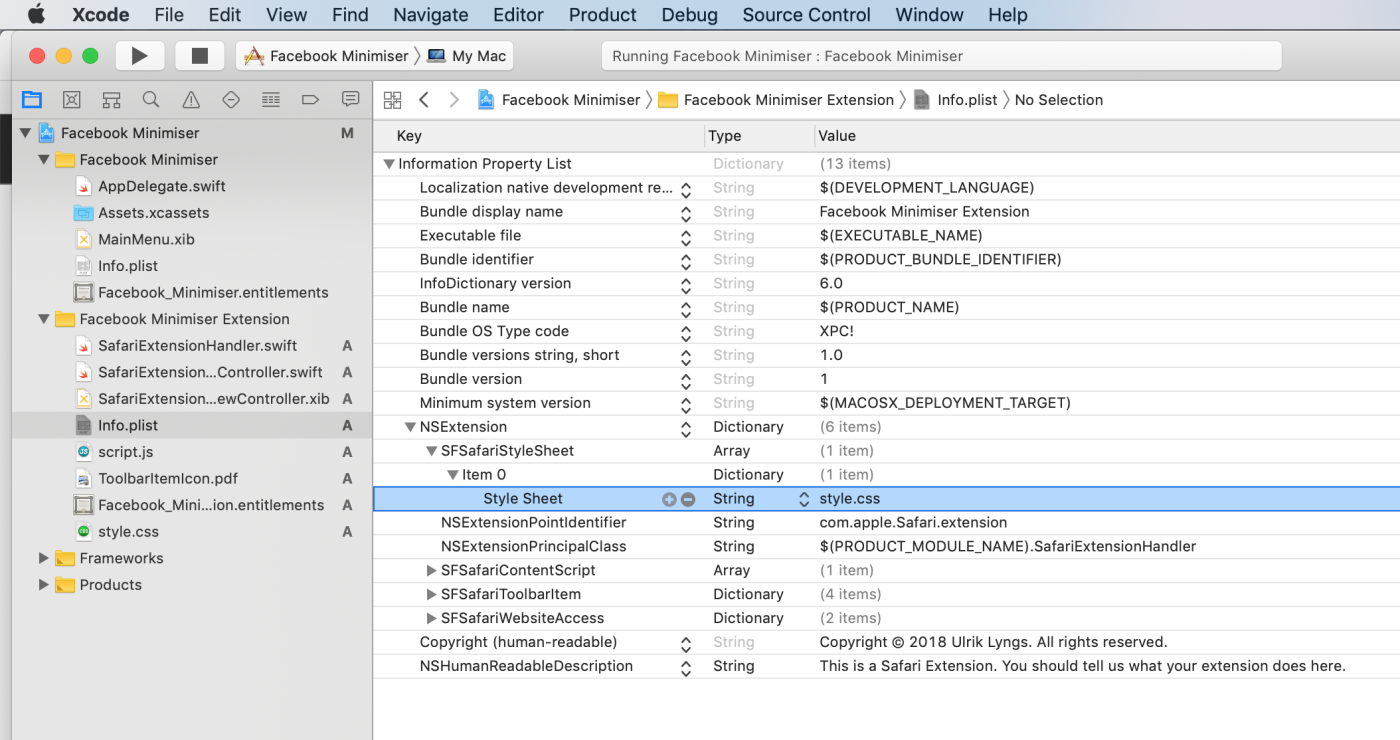
Point to our style sheet
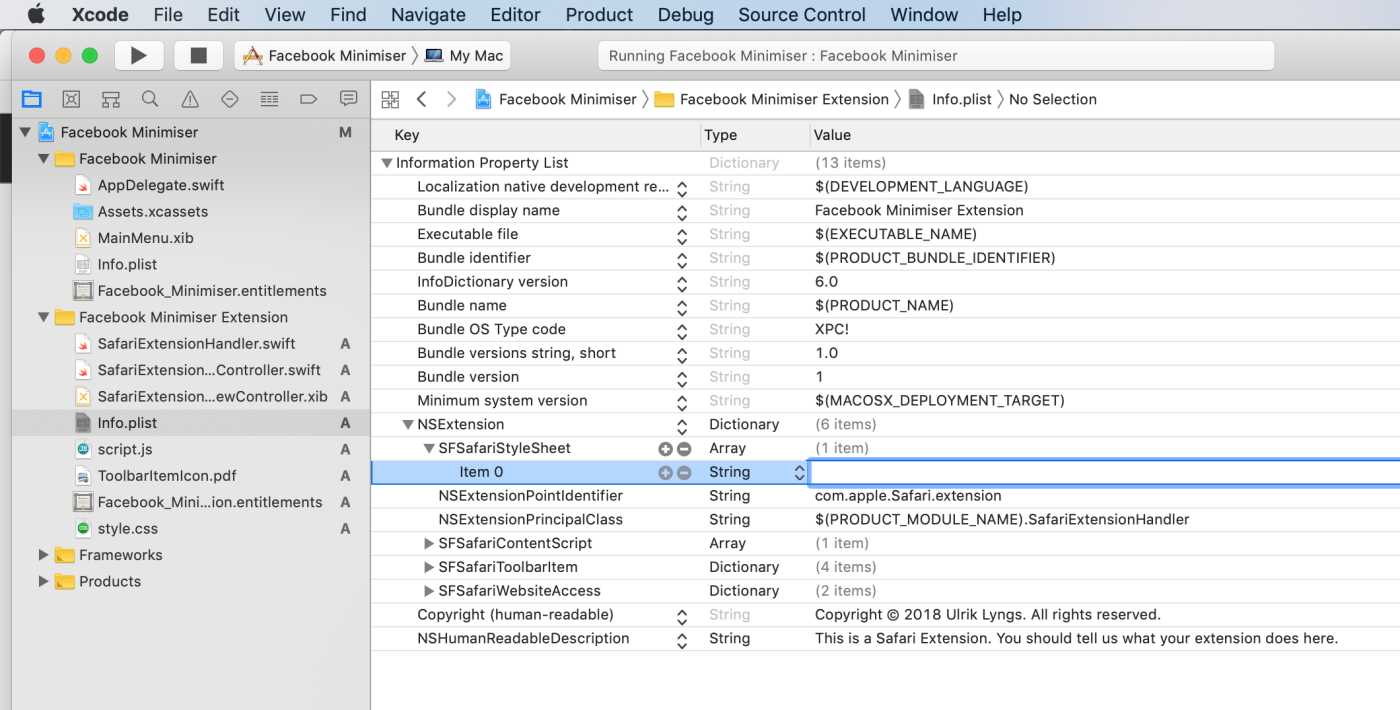
Set websites to target
Finally, expand ‘SFSafariWebsiteAccess’ and under ‘Allowed Domains’ set the ‘Item 0’ element’s value to ’*.facebook.com’:
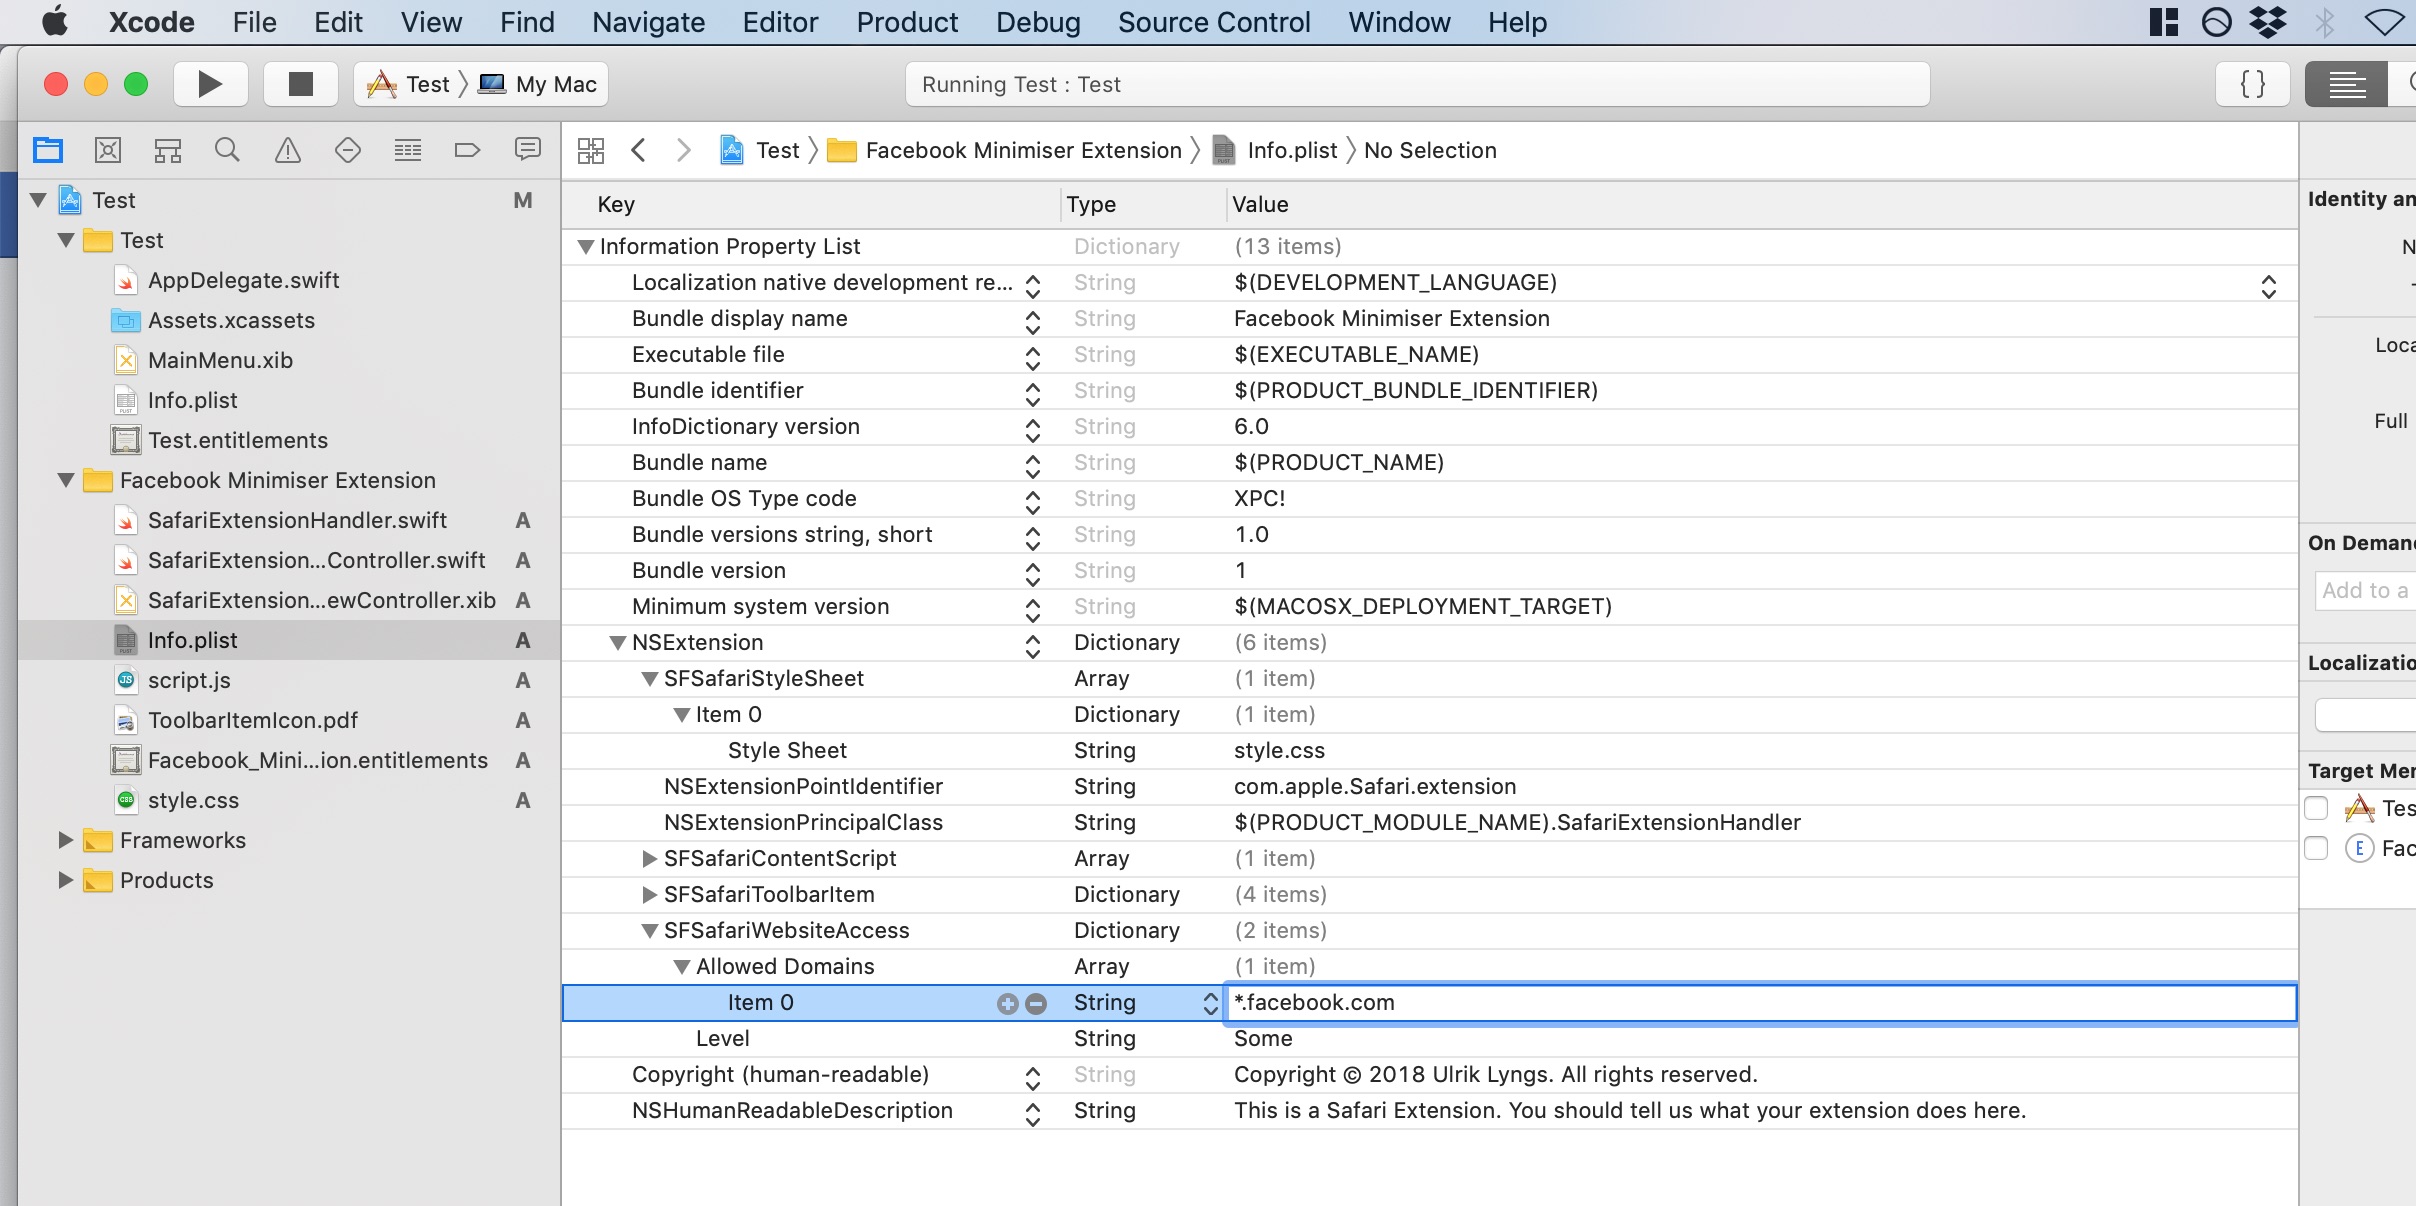
Inject only on Facebook
Now, if we rebuild our app and activate the extension in Safari, we see the news feed has been hidden:
Step 6: Tweak the CSS
Finally, tweak the content of style.css to build my Facebook Minimiser:
/* ELEMENTS TO REMOVE FROM DISPLAY */
#pagelet_ego_pane, /* recommended for you and sponsored content */
#u_0_1t, /* right side bar instant chat people online */
#u_0_1u, /* right side bar instant chat prompt */
#u_0_1v, /* right side bar instant chat prompt */
#pagelet_rhc_footer, /* select language prompt, and Facebook copyright footer */
#createNav, /* create shortcut on the bottom left */
#appsNav, /* explore bar on the left */
#pagelet_trending_tags_and_topics, /* trending topics */
#stories_pagelet_rhc, /* stories */
#topnews_main_stream_408239535924329, /* newsfeed */
.fbChatSidebarBody,
#u_0_1w,
#pagelet_gaming_destination_rhc, /*gaming sidebar*/
#pagelet_marketplace_new_user_top_picks_rhc /*market place sidebar*/
{
    display: none !important;
}

/* remove border from where the chat sidebar was */
.fbChatSidebar {
    border-left: none !important;
}

/* make the background white instead of the usual depressing grey */
#globalContainer,
#contentCol,
._5vb_,
._5vb_ #contentCol,
#u_0_1s,
._4oes,
._51x_,
body {
    background-color: white !important;
}
And now we get a nice, simple, and distraction free Facebook experience:
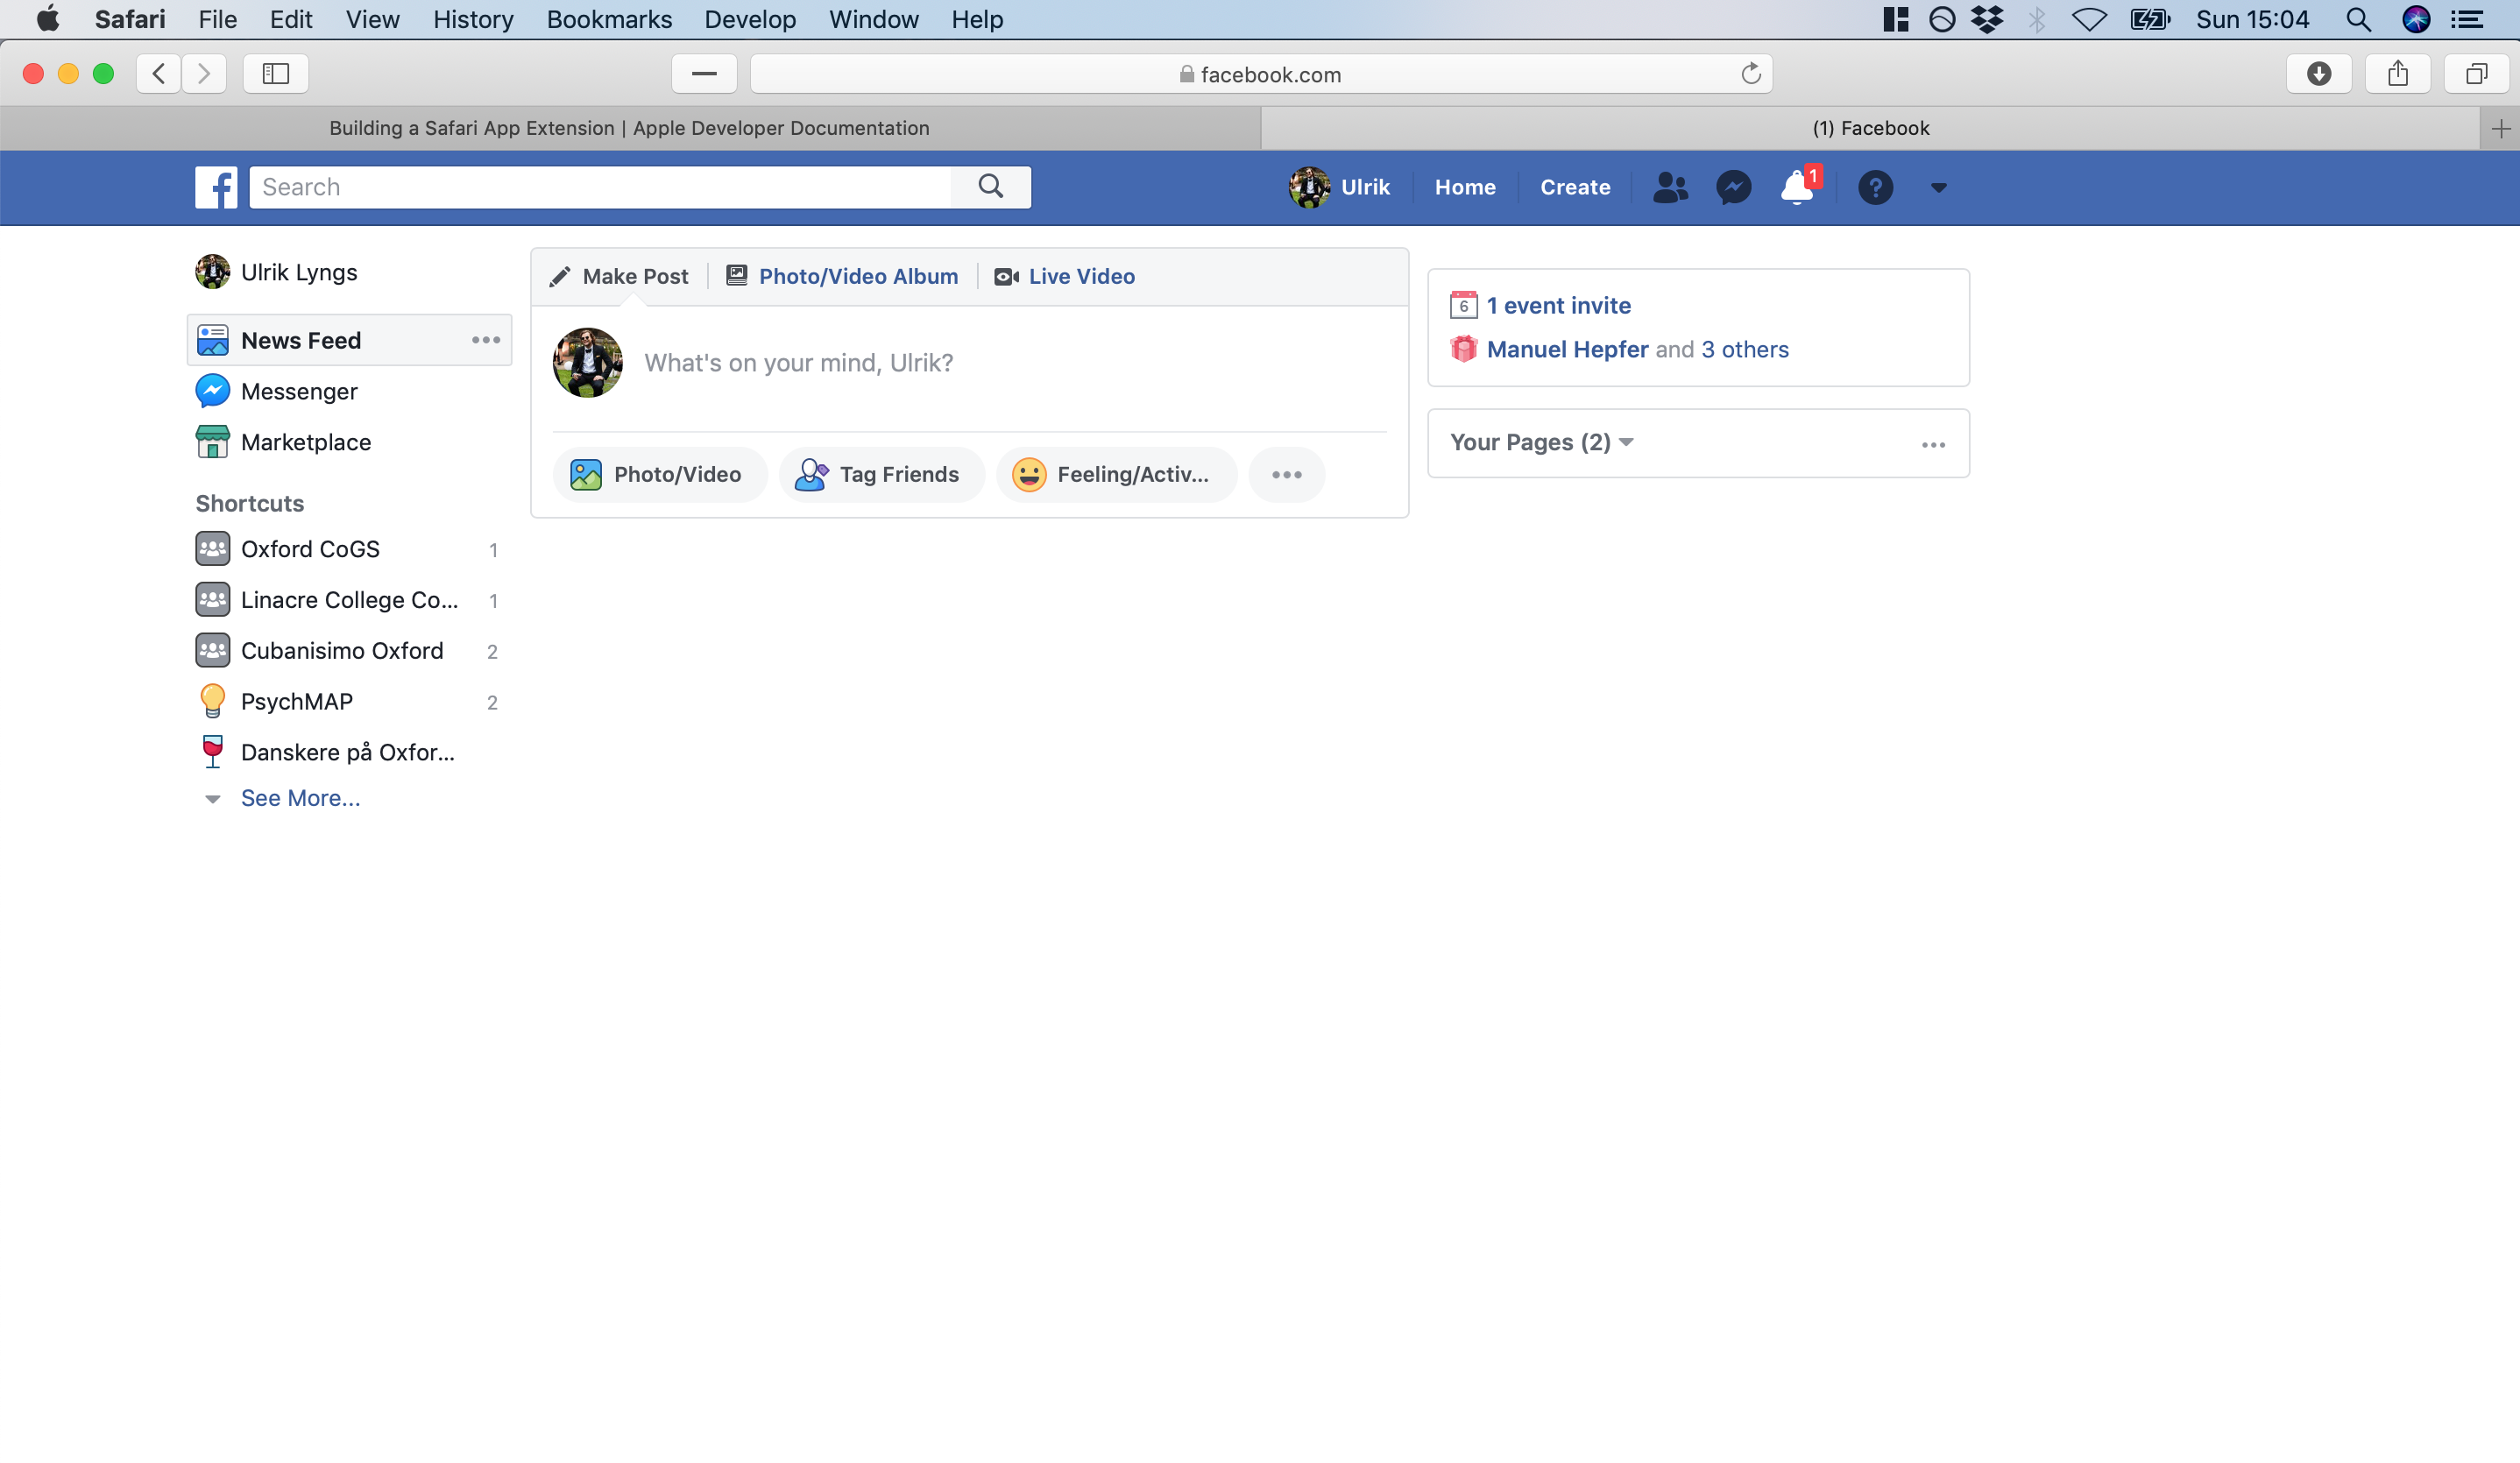
Distraction-free Facebook!
Step 7: Celebrate! (almost)
These are the basic steps to embed a basic Safari Extension in an app using Xcode. I did find (and filed a bug report to Apple) that in Mojave, my extensions would at times mysteriously disappear from Safari > Preferences > Extensions - hopefully this won’t occur on your machine and/or Apple will fix this bug ASAP.
The Info.plist file is quite similar to the manifest.json file used in Chrome extensions.↩︎
Comments
I use the open source, zero-tracking utteranc.es widget for comments - it's built on GitHub issues, so you need a GitHub account to comment.